
Changing the root password of your Vultr VPS is easy. All you need is access to your Vultr account.
If you can log in to your Vultr account, be ready and follow the steps in this tutorial.
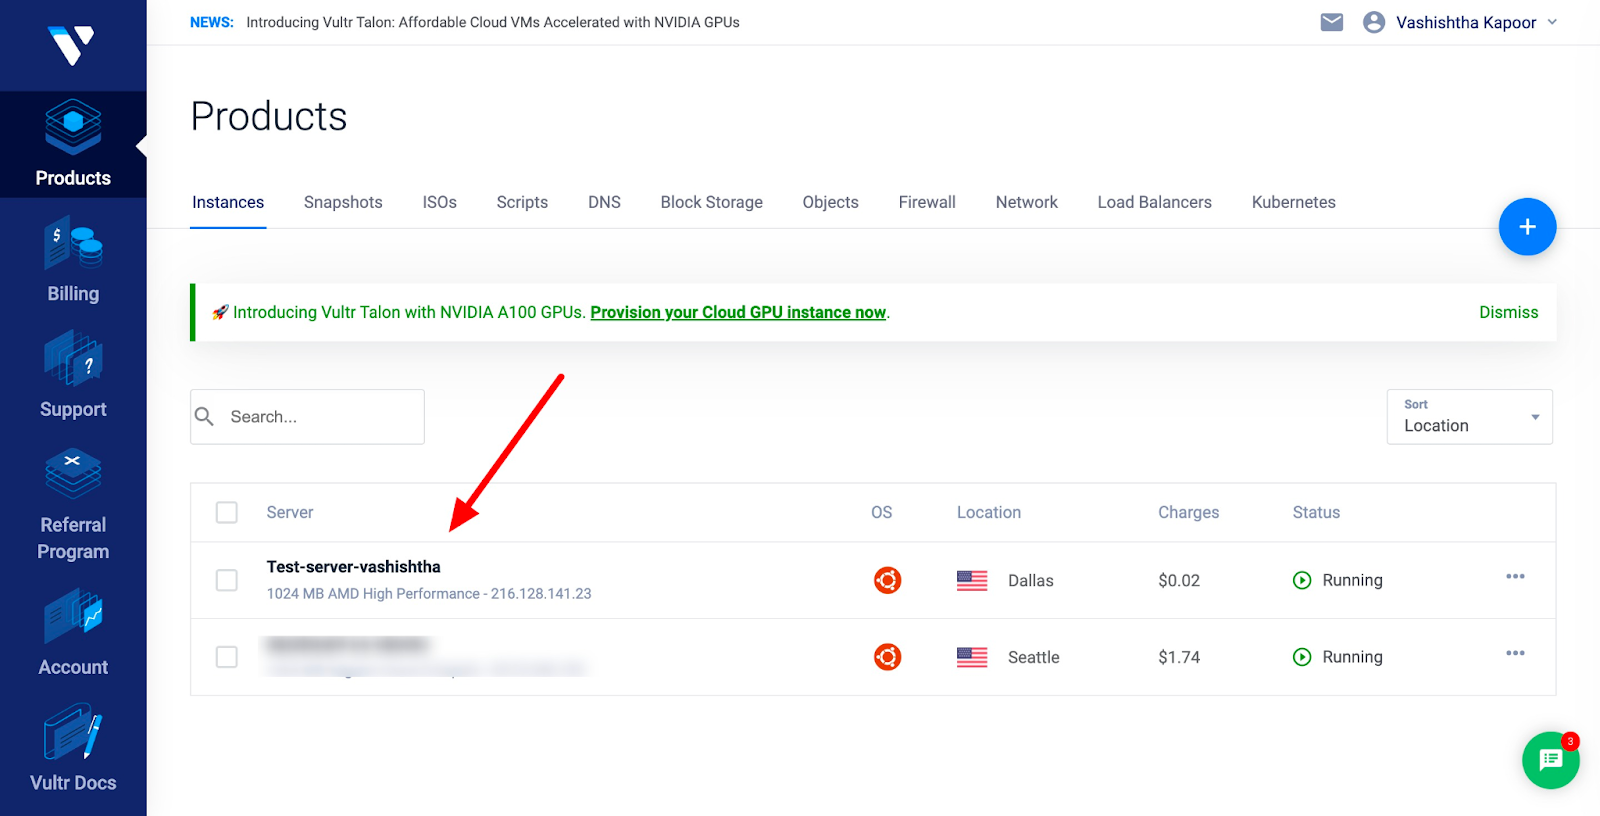
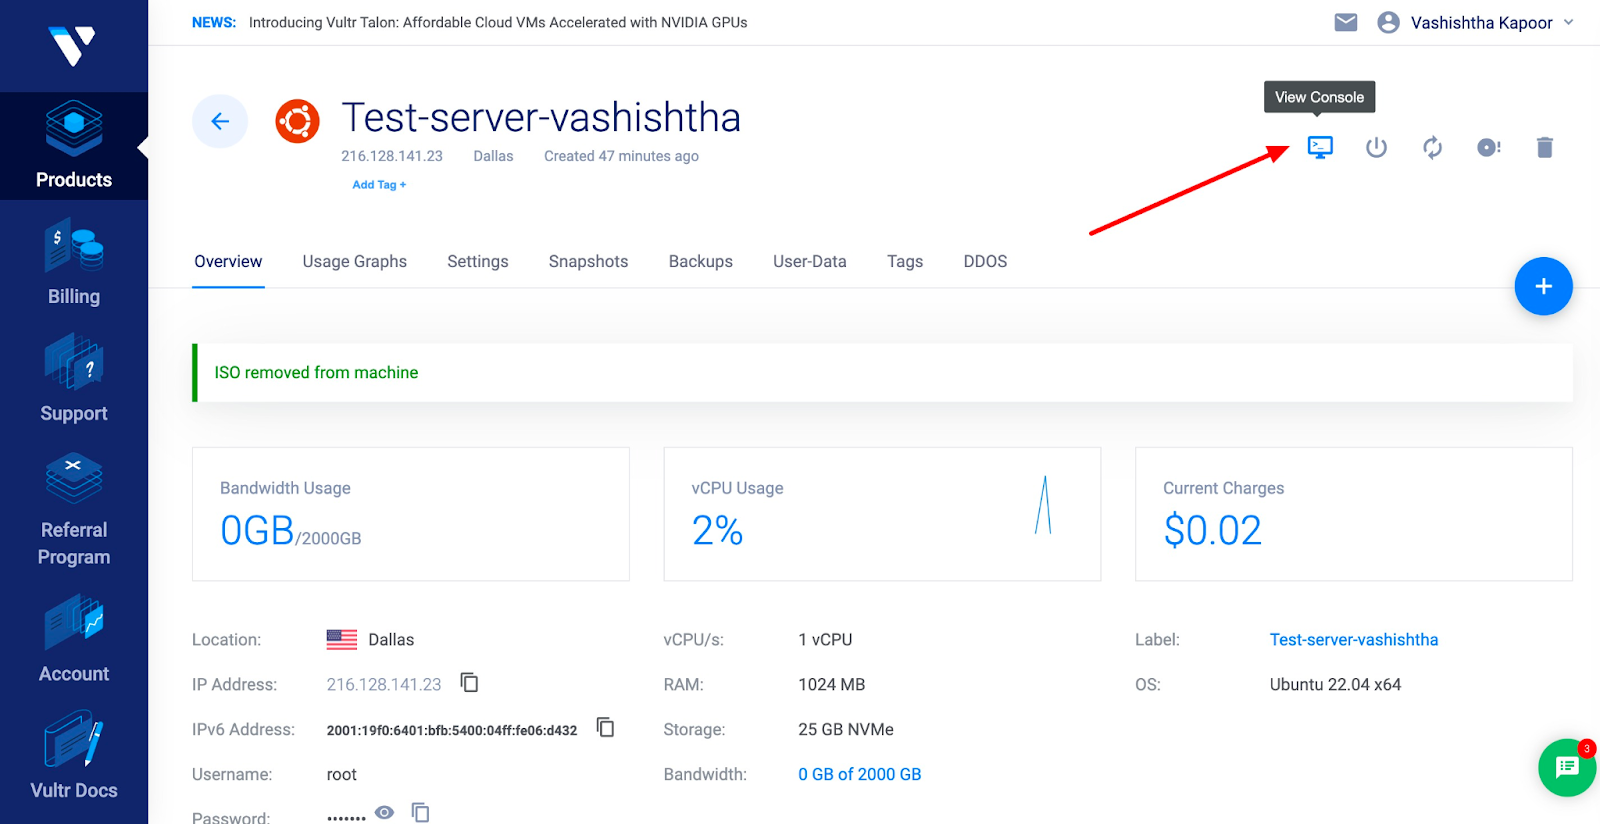
Click on your server.
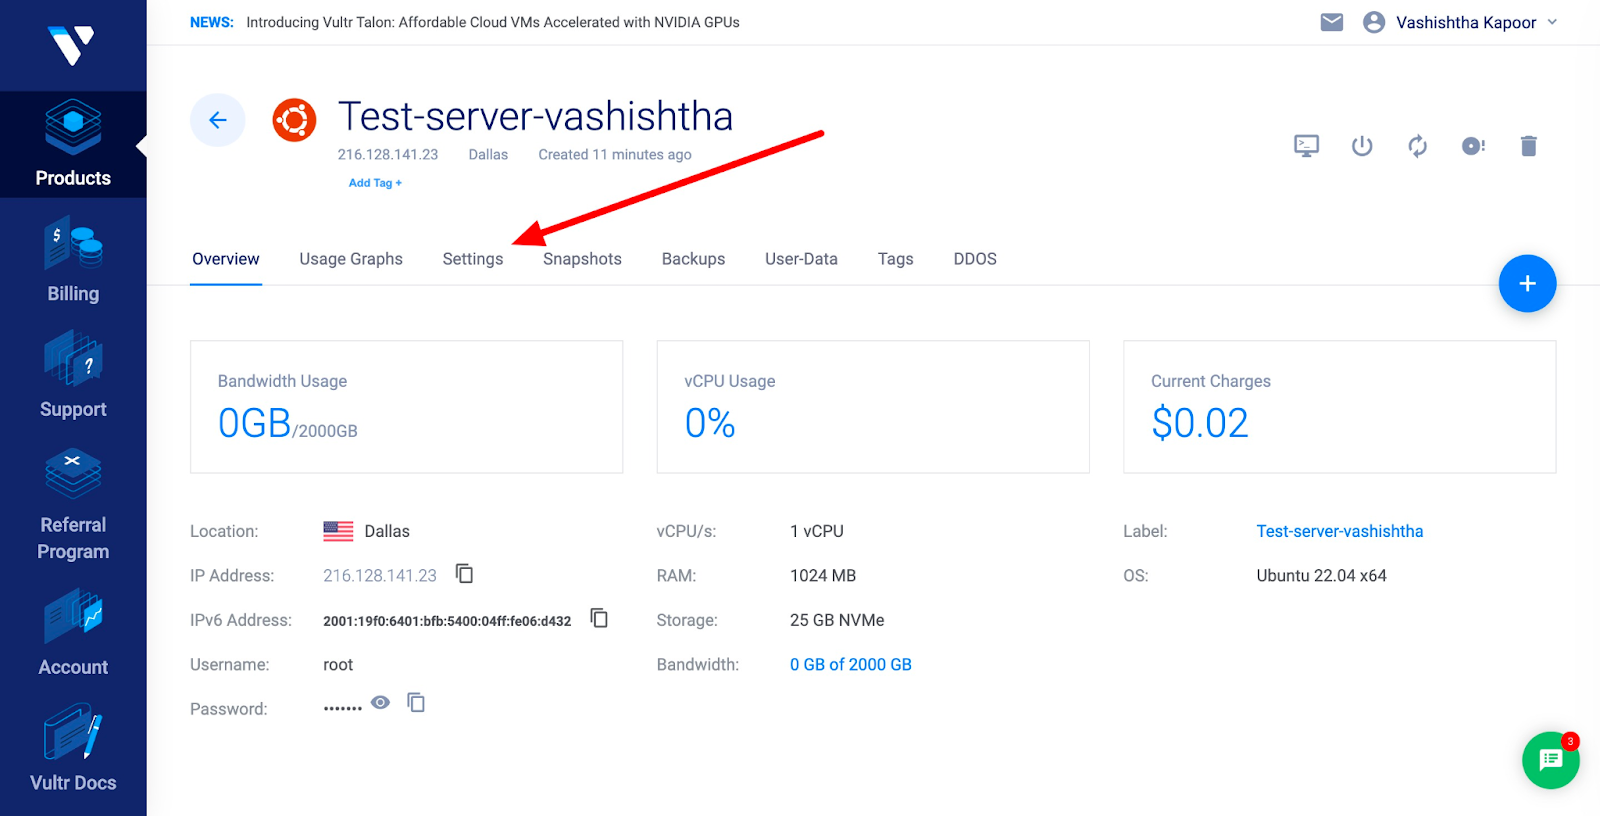
Go to Settings
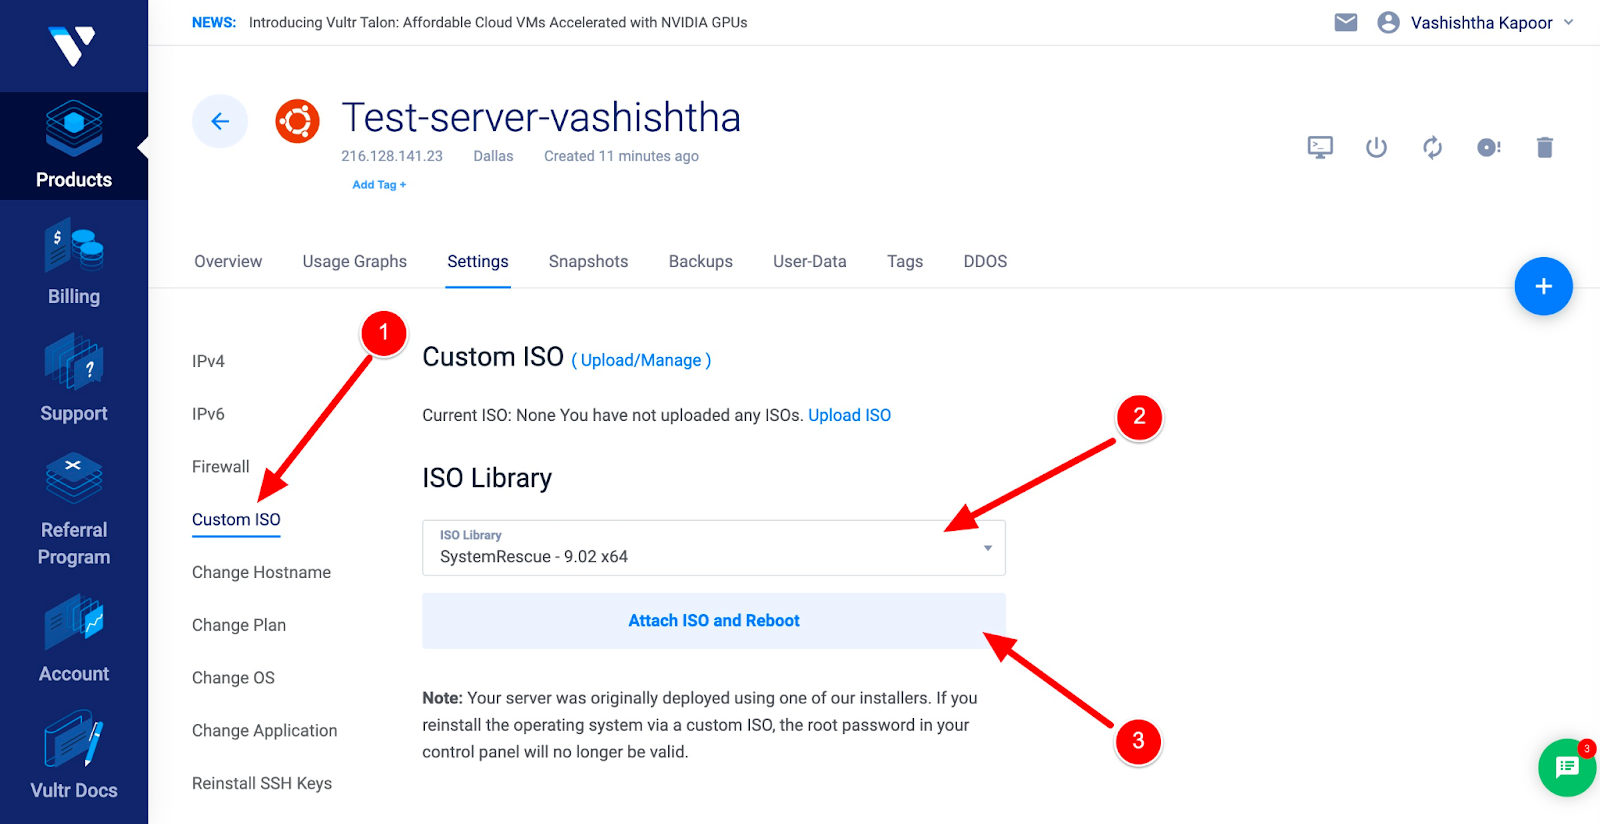
Choose Custom ISO and choose SystemRescue 9.02 x64, and click on Attach ISO and Reboot.
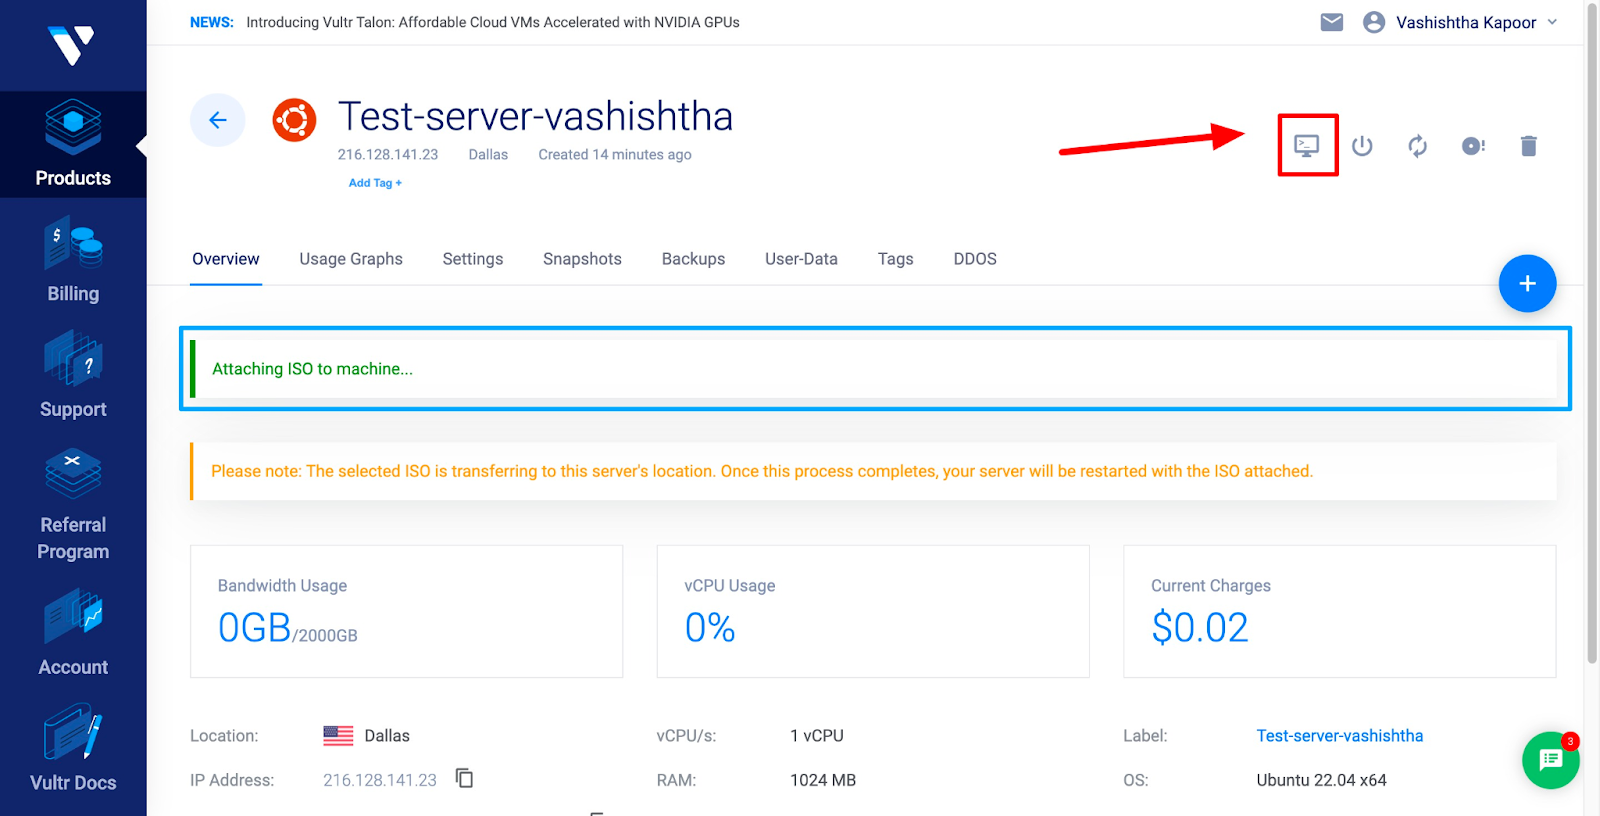
Now you will see “Attaching ISO to machine…”. Wait for a while and click on
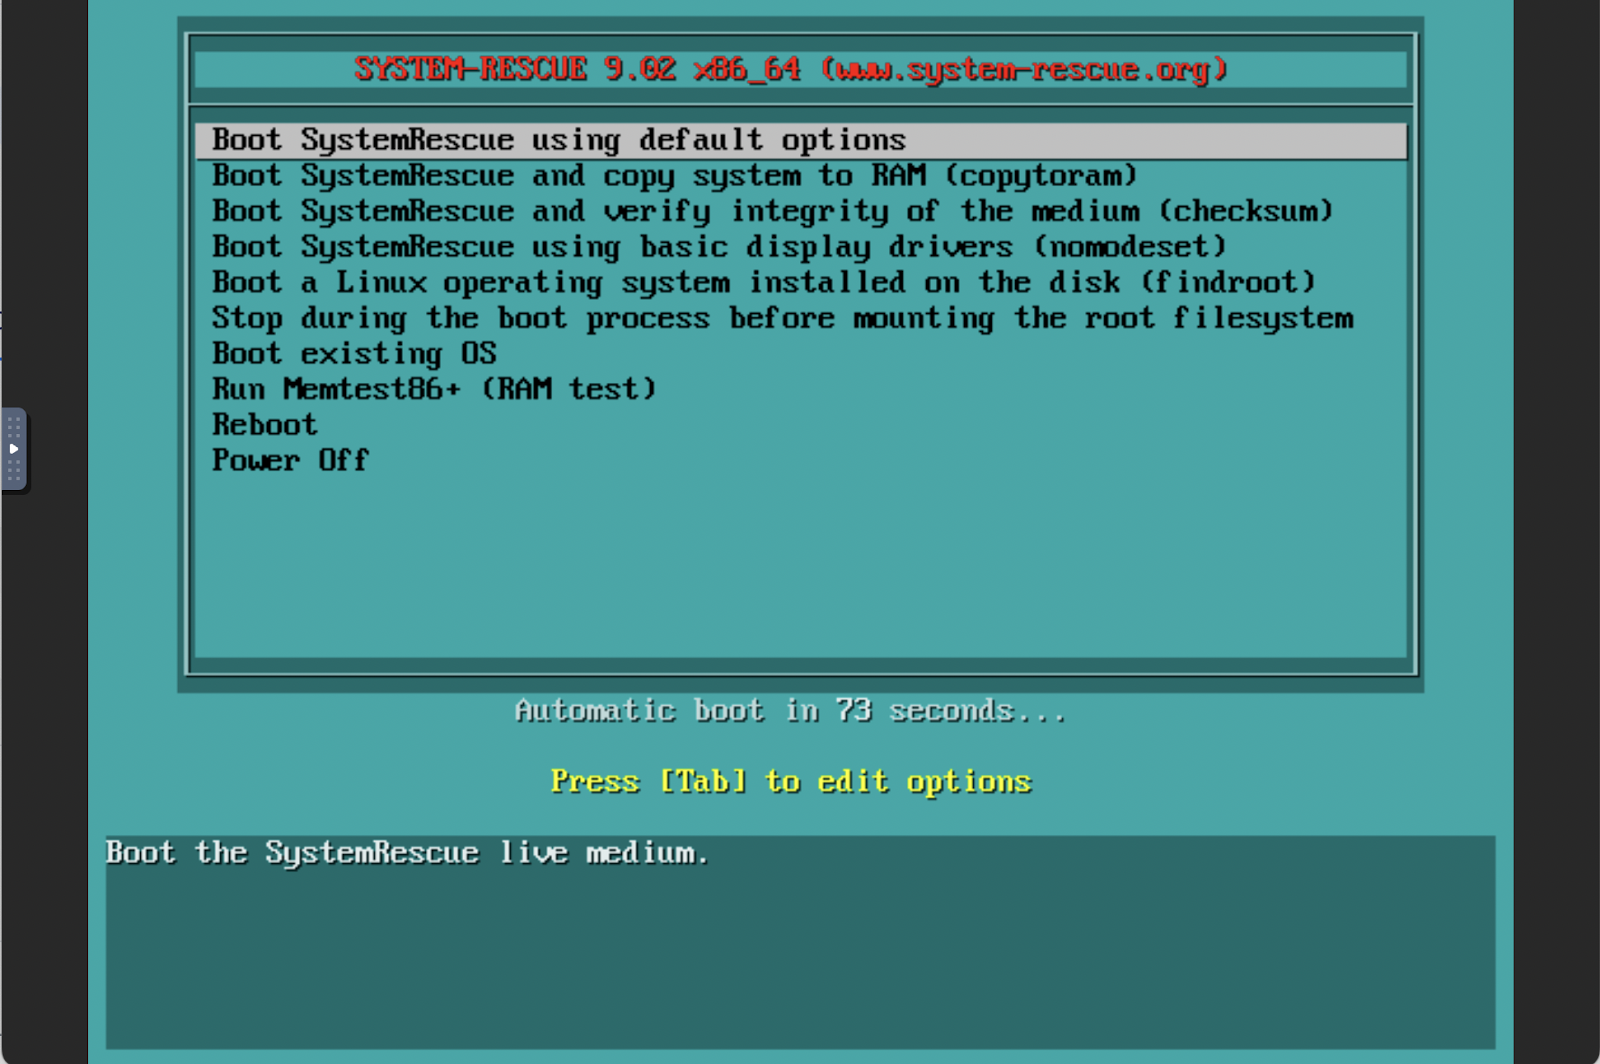
You will see the boot screen like this, choose the first option and press “Enter”
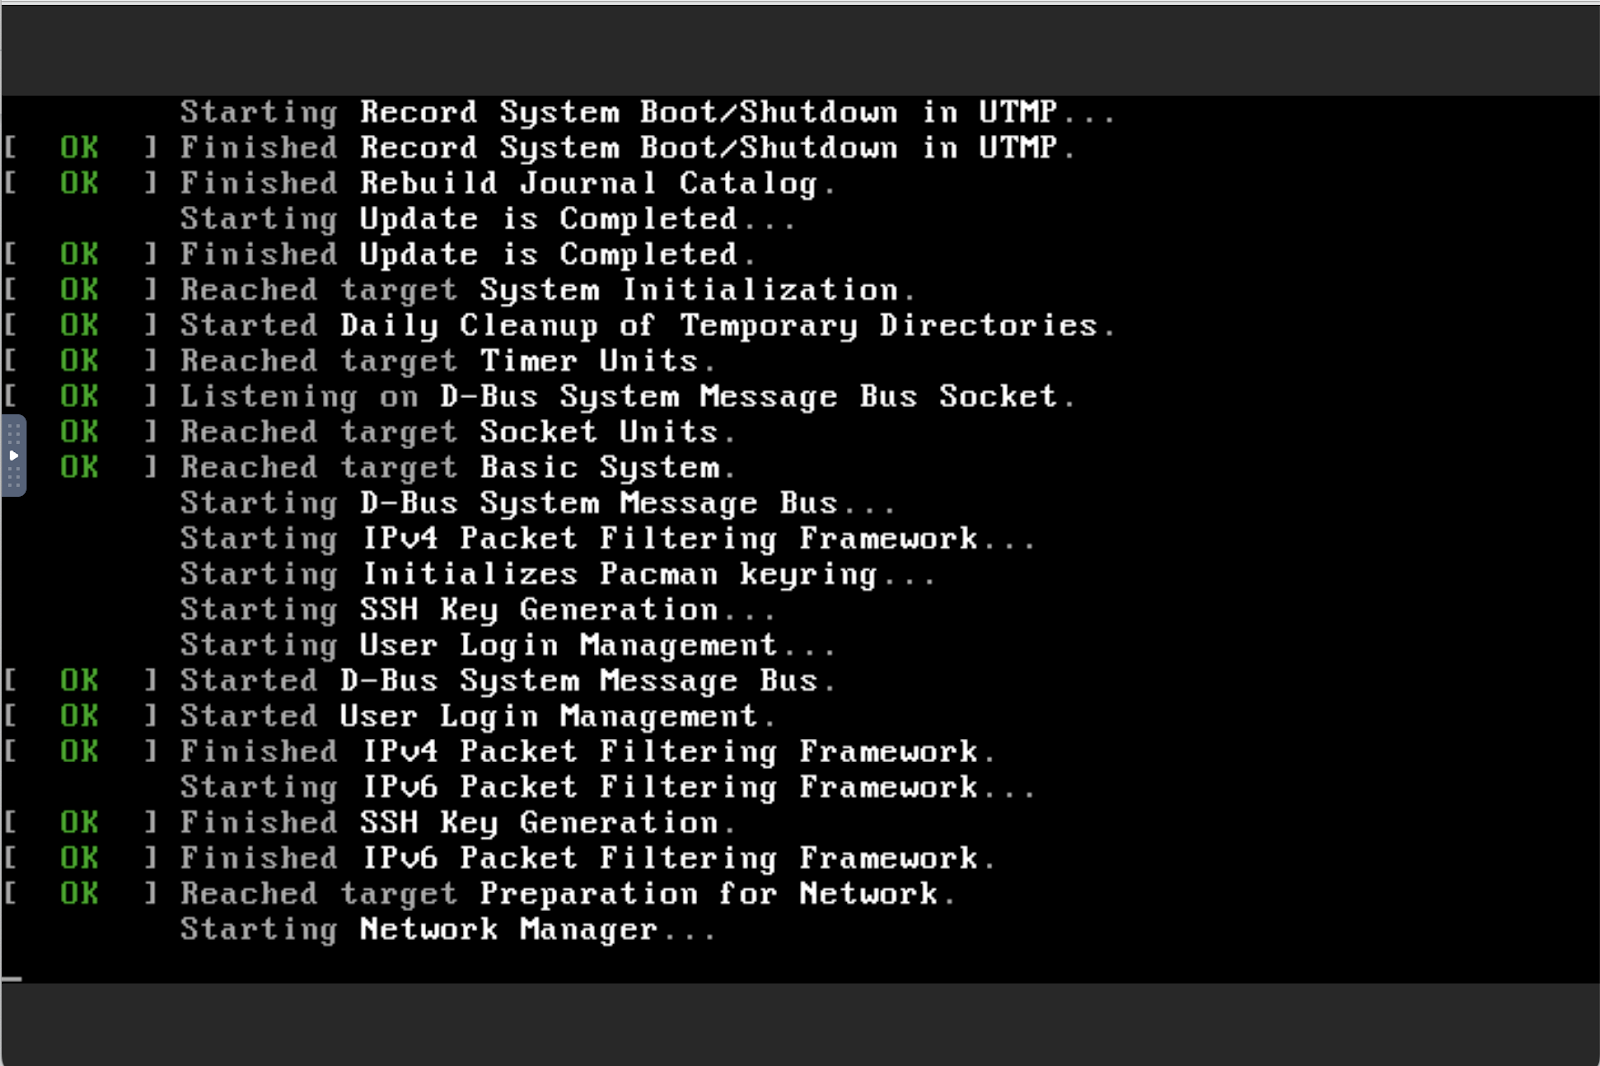
It will take time and process
And at the end, you will see this prompt.
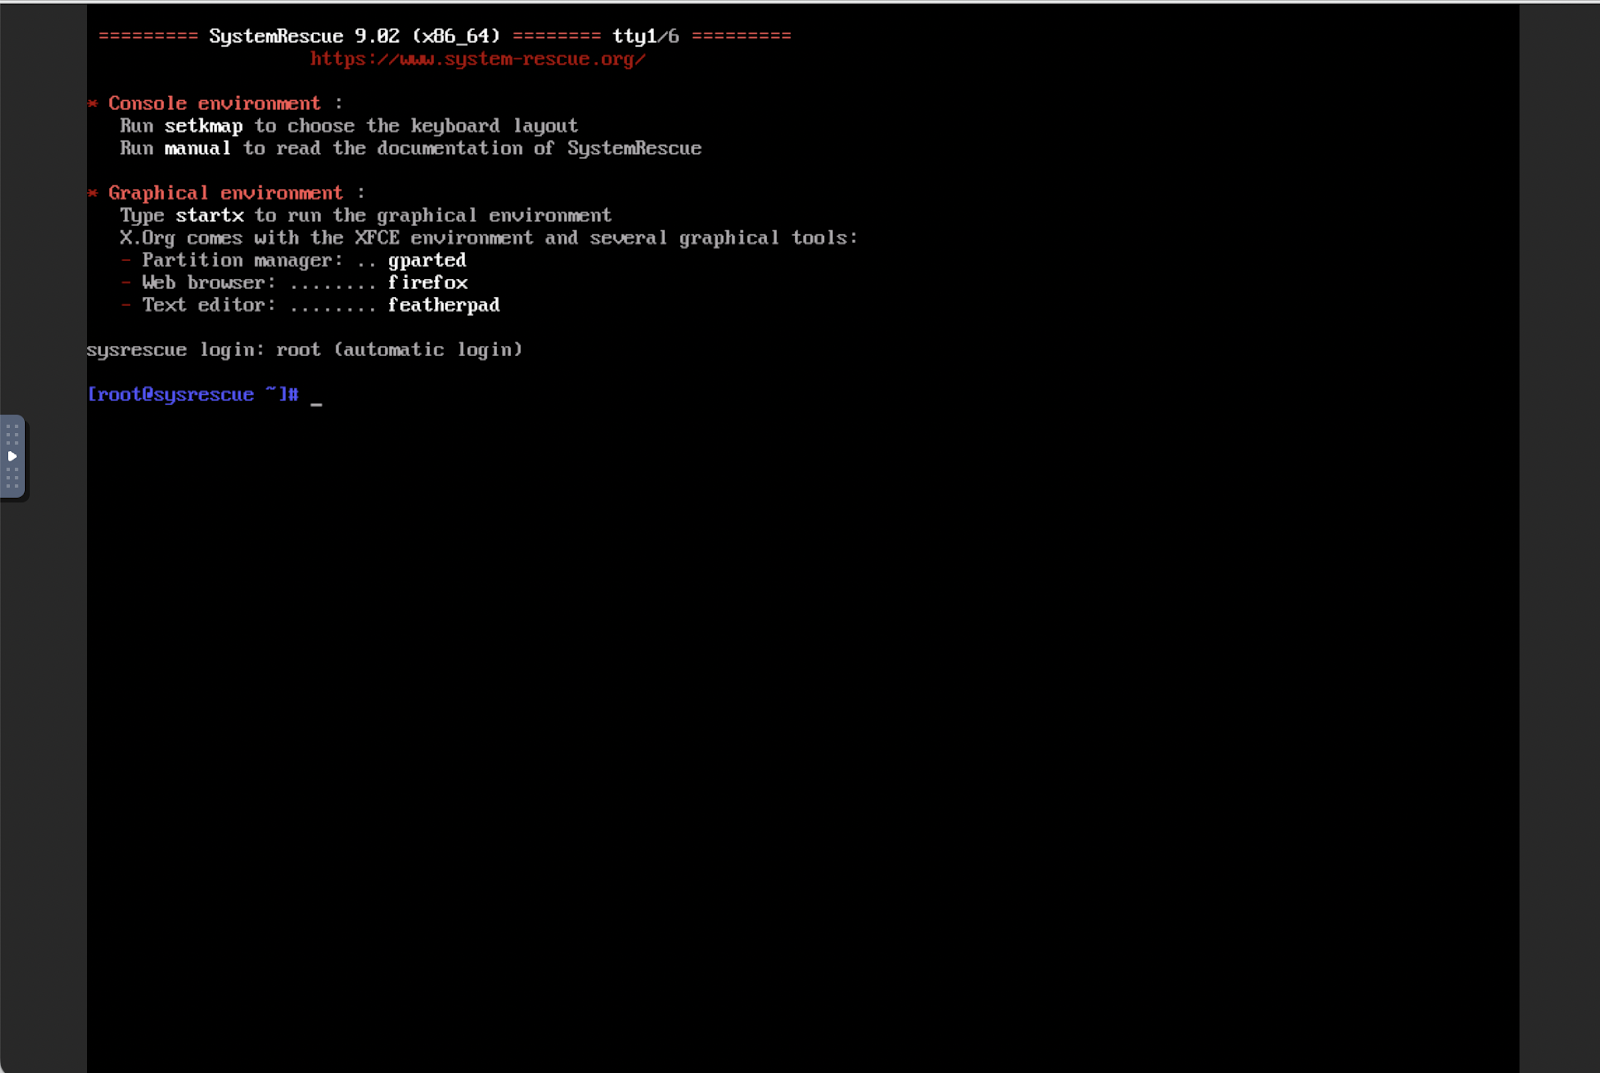
Here, you need to start with the commands I am writing down.
Check the partitions with the following command
parted -l
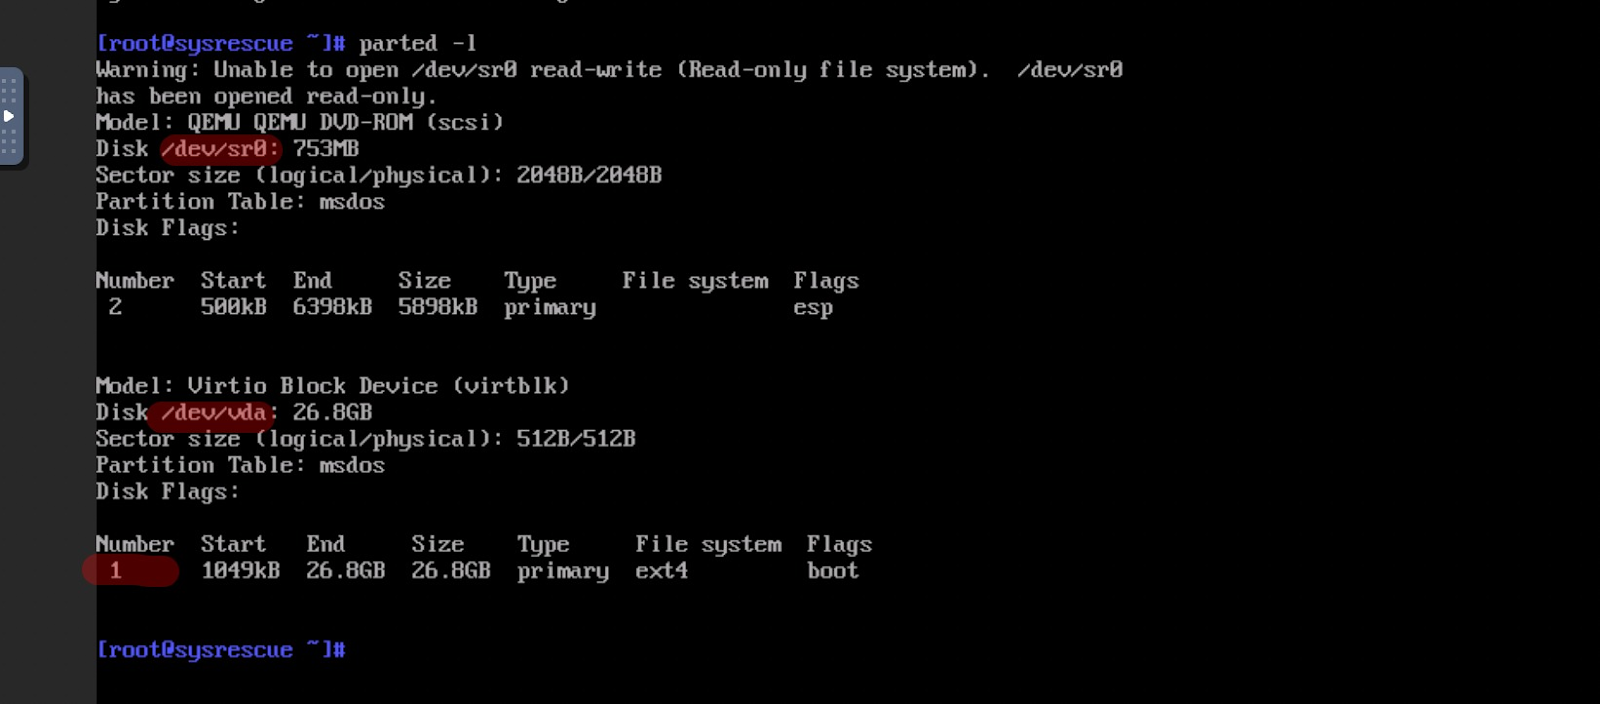
There are two disks. /dev/sr0 and /dev/vda. We will mount it. I have added 1 because the partition number is 1.
Mount /dev/vda1 /mnt

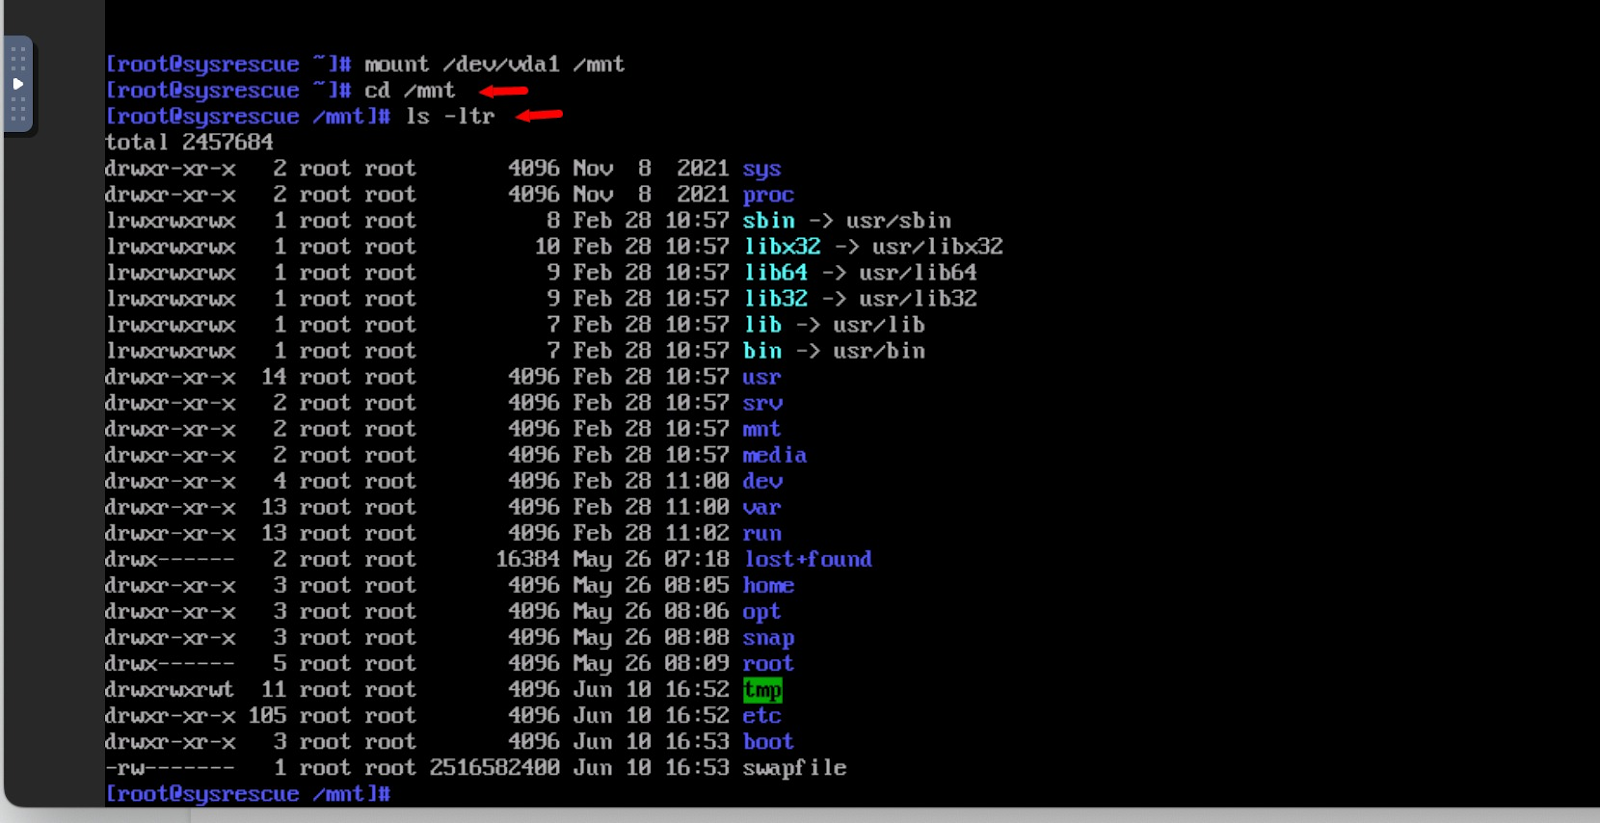
Now let’s go the /mnt and see what all files are there.
cd /mnt
ls -ltr
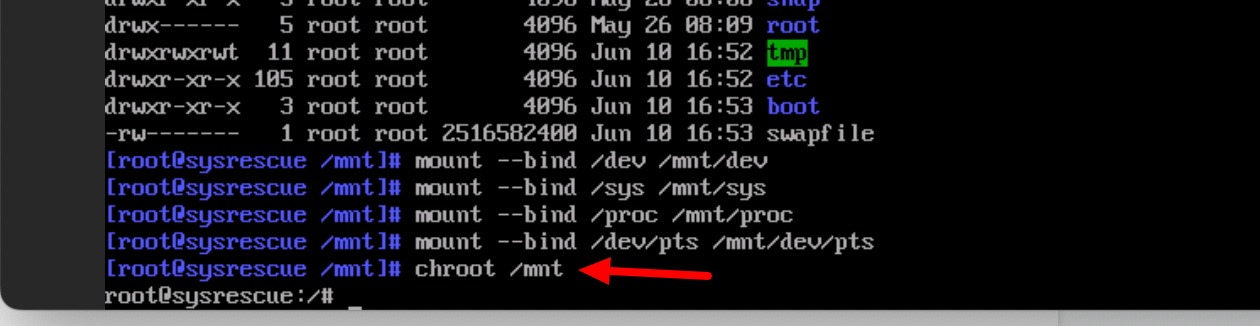
We have to chroot the file system. So, use the following commands one by one.
mount --bind /dev /mnt/dev
mount --bind /sys /mnt/sys
mount --bind /proc /mnt/proc
mount --bind /dev/pts /mnt/dev/pts/

And now use command
chroot /mnt
Now you can simply type the passwd command to reset the password.
passwd

Now, You only need to make sure that you can login with this root password in your terminal or Putty using SSH.
Go to /etc/ssh/ and edit sshd_config file.
cd /etc/ssh/
ls

Edit sshd_config file.
sudo nano sshd_config
Navigate to this line with your arrow keys.
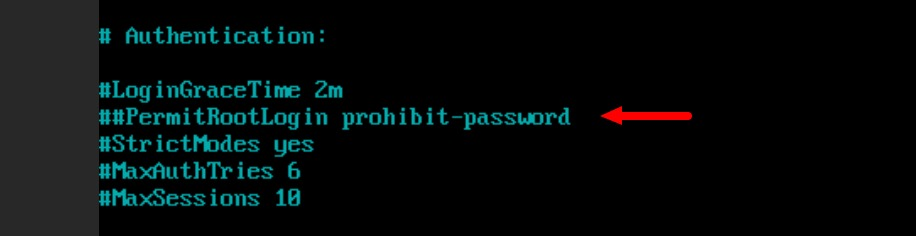
Remove ## before this line. And replace prohibit-password with yes.

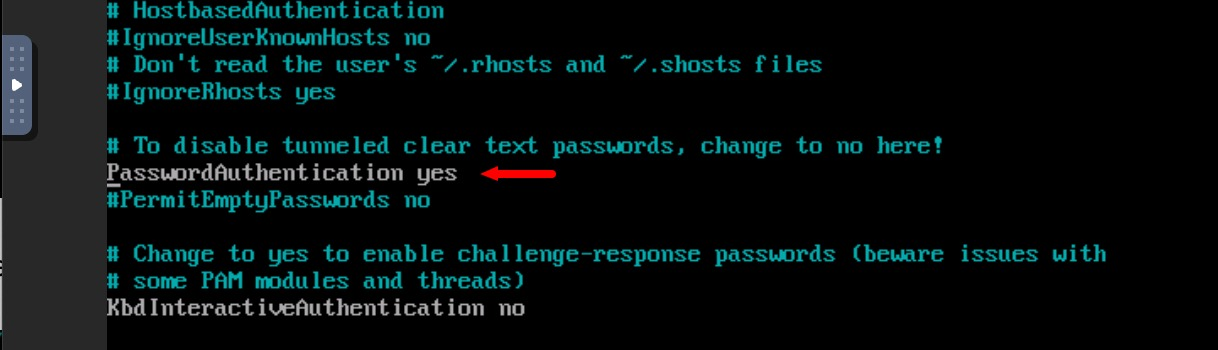
You can now use CTRL + W to search. Search the line with PasswordAuthentication
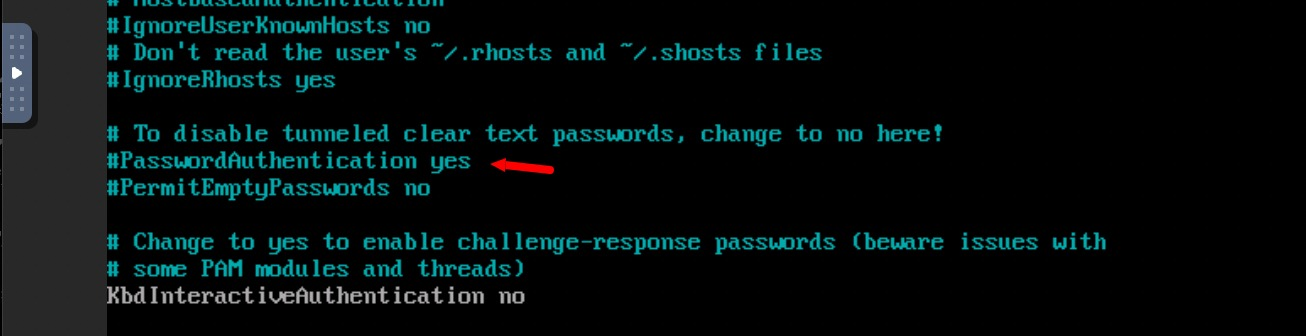
Remove the # in the start of this line.
Use CTRL + X, Type Y, and press ENTER. To exit and save the file.
Exit from chroot and Reboot the server.

You will now see the boot screen again.

Let’s go ahead and deactivate the SystemRescue ISO that we attached to the server.
Go back to Settings > Custom ISO and click on “Remove ISO” button.

And Confirm Remove.

Once you Confirm “Remove ISO” the server will be rebooted and you will now be able to login to your server.
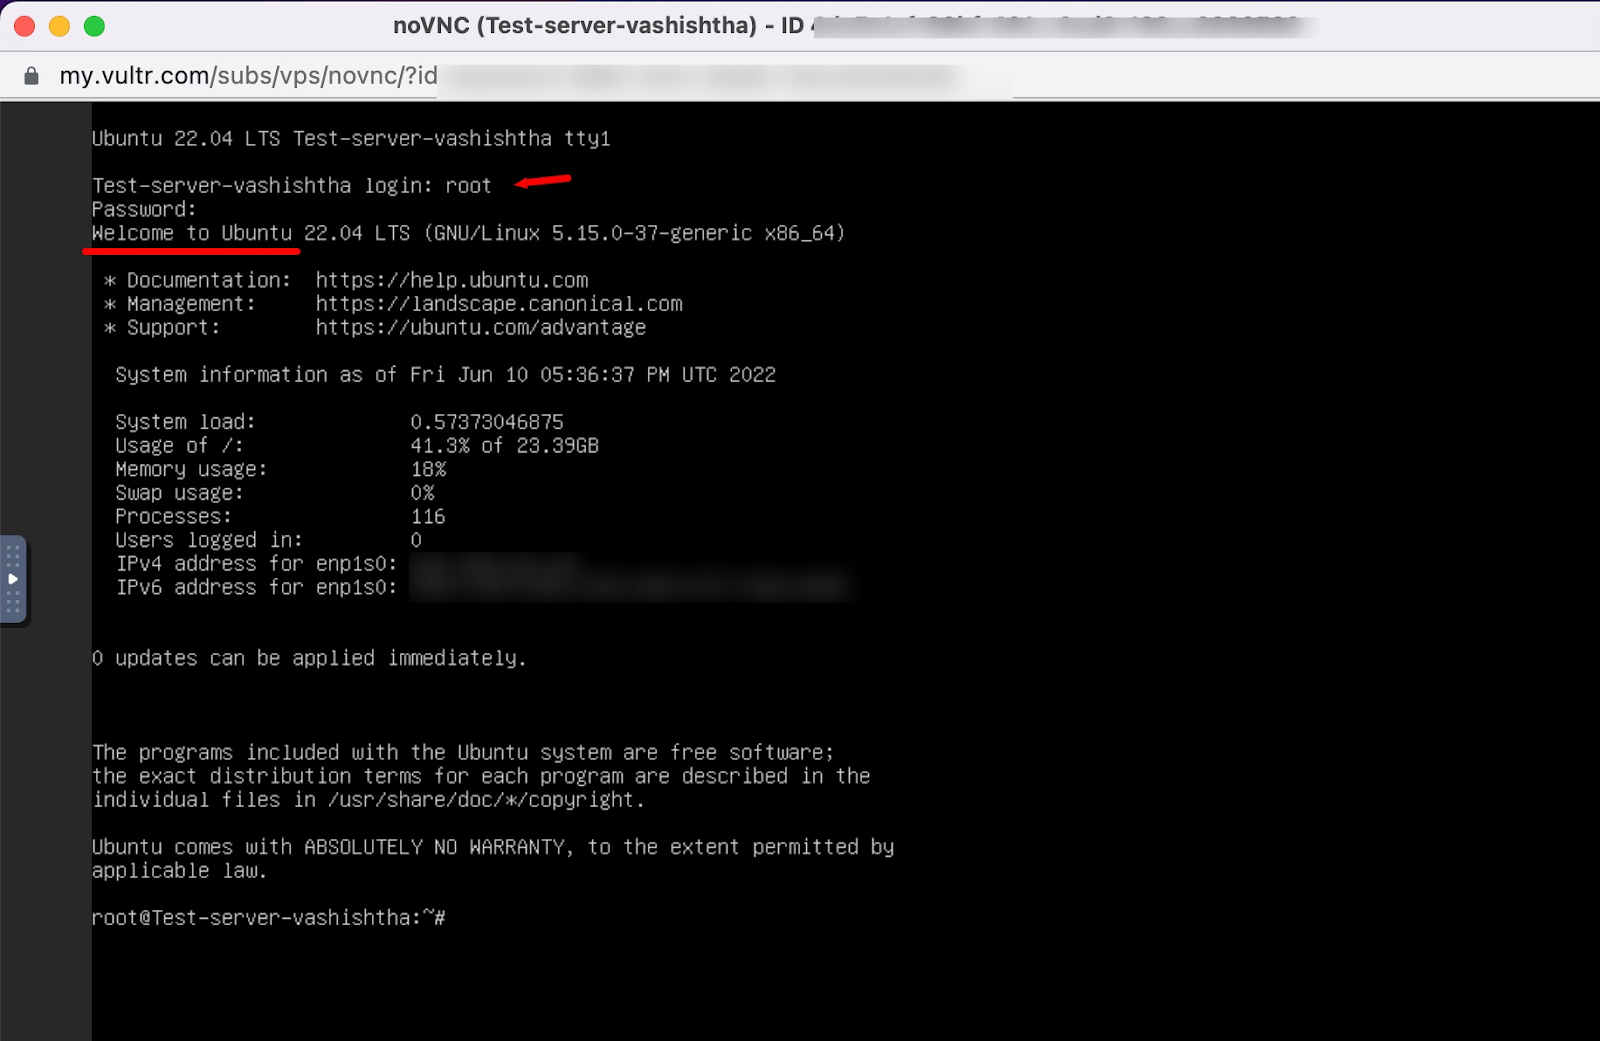
Let’s first log in using the Console.
I used my new root login credentials and got logged in to the server.
To confirm, you can now use your Mac Terminal or Putty to log in to the server. It works!
Do you want to move to a different cloud infrastructure?
- Move to UpCloud (and get $25 credits to start)
- Move to Contabo (8GB RAM server starts from just $6.99 per month)
- Move to Linode (and get $100 credits to start for 2 months)