
Ever wondered how exactly you can install and run a Geekbench benchmark test on your VPS and compare it with any other server? Here's how you can do that with Geekbench 4. On Ubuntu 20.04 or Ubuntu 18.04 LTS. The primary requirement to run a benchmark test is that
- You must be logged in as root into your Server
- Your server must have a working internet connection
Let's start. Make sure you're logged in as root. To do this, you can use the whoami command.
Step 1: Check and confirm you're in /root:
pwd
Step 2: Download Geekbench files from the official website geekbench.com:
wget http://cdn.geekbench.com/Geekbench-4.3.3-Linux.tar.gz
Step 3: Extract the downloaded files in the root directory:
tar -zxvf Geekbench-4.3.3-Linux.tar.gz
Step 4: Go to the extracted folder:
cd Geekbench-4.3.3-Linux
Step 5: Run the benchmark script:
./geekbench_x86_64
It takes a few minutes for the Geekbench script to perform all the benchmark tests. The results are automatically uploaded to Geekbench, and you will see a unique link to your test results.
Upload succeeded. Visit the following link and view your results online:
https://browser.geekbench.com/v4/cpu/16567449
Now you can copy the link from your terminal window and paste it into a browser to view the detailed benchmark report. Here's how it looks like: 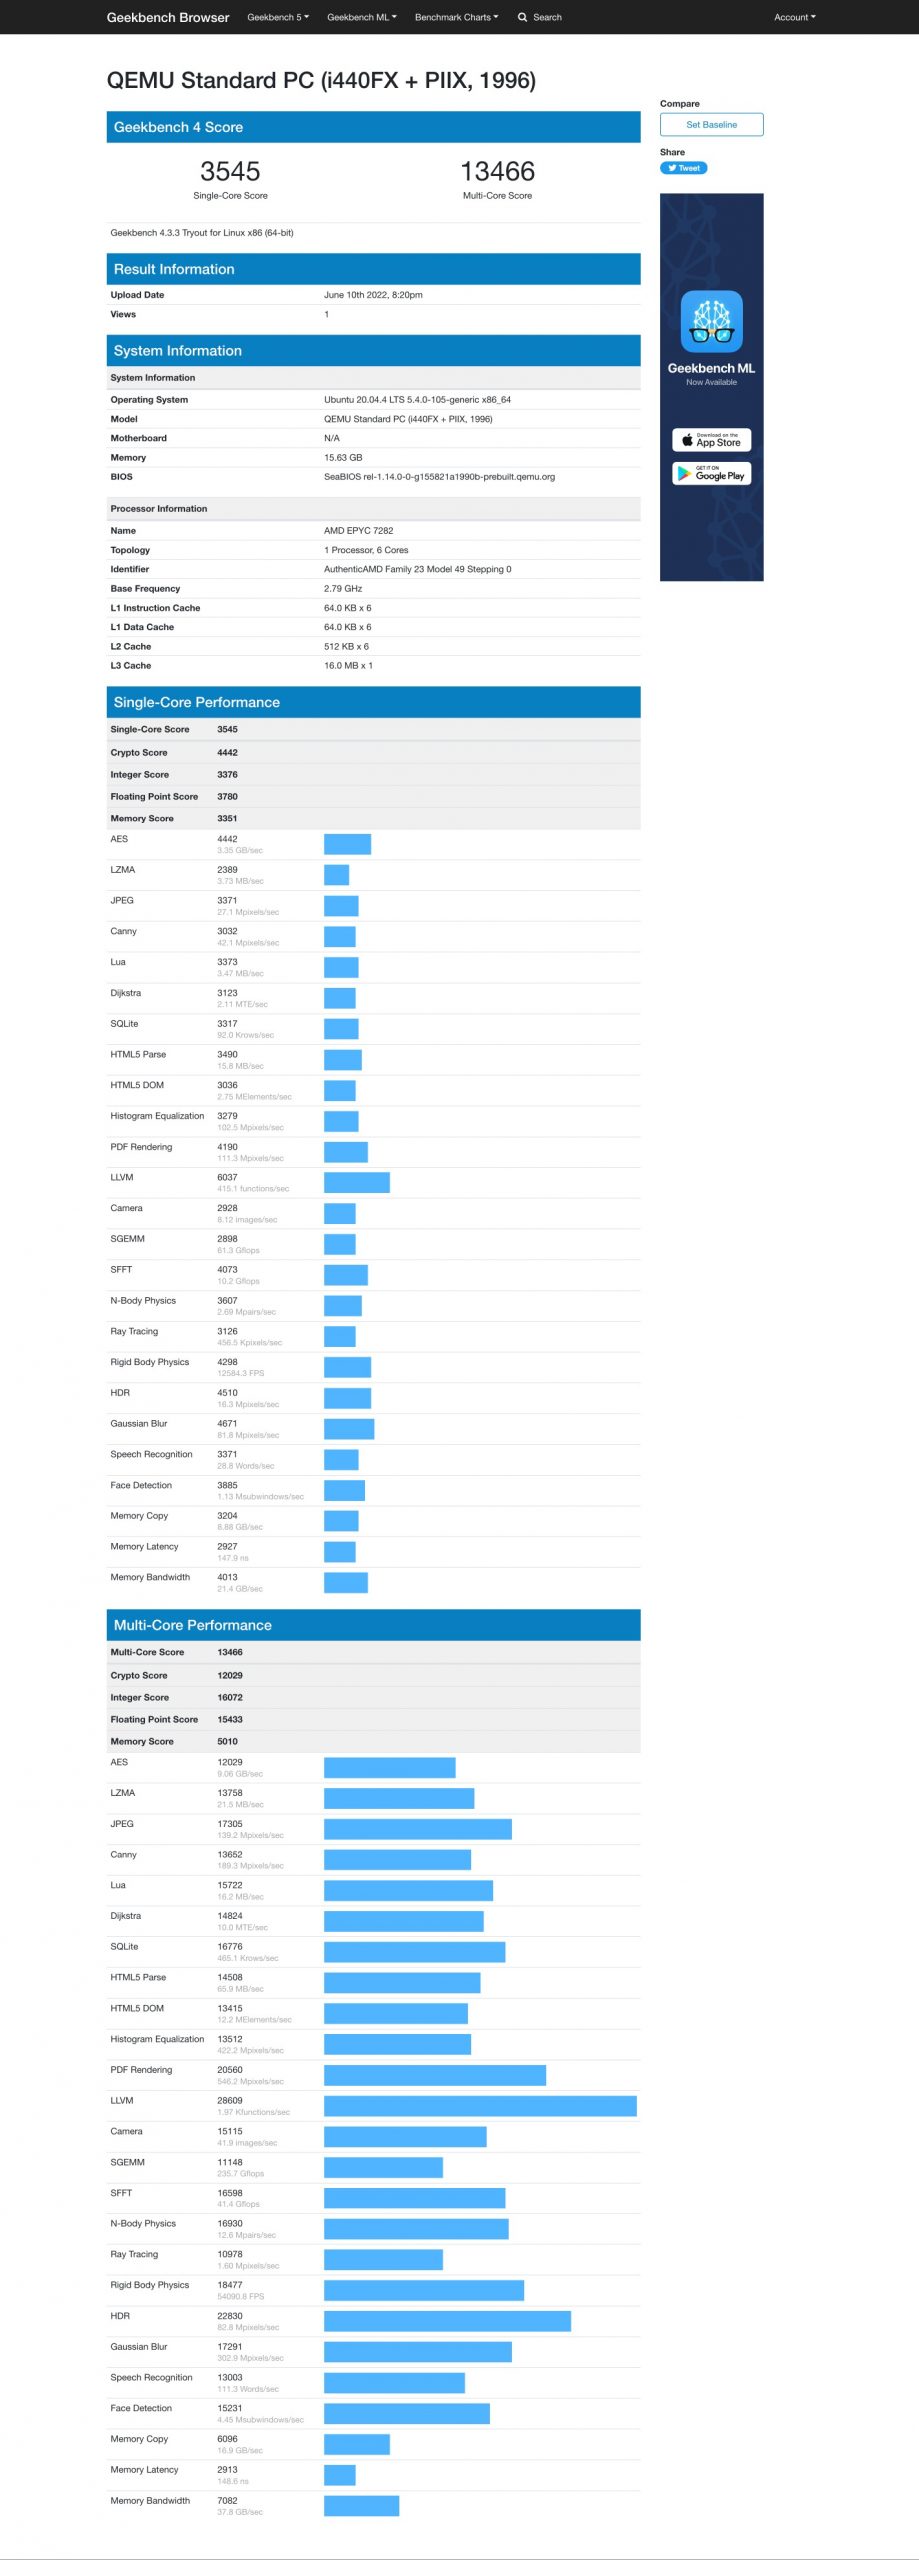 I ran the above test on a Contabo VPS. I got 4 vCPU, 8 GB RAM, 32 TB Traffic, and 50 GB NVMe in a VPS for just $6.99. Get one for yourself Now. Cheers!