
Do you want to host your website hassle-free on a Cloud Server? Yes, managing a server using the SSH terminal everytime to host a website is messy. If you do not want to put your hands into SSH terminal (putty) and still manage to host multiple sites on a single VPS server, read on.
Whether you want to deploy a server on DigitalOcean, AWS, Vultr, Google Cloud, or any other cloud server, you can do it effortlessly in minutes. To manage the server and deploy web applications on it, you need a powerful cloud control panel.
Out there, you will find many cloud control panels like ServerPilot and RunCloud but these control panels have some limitations.
CloudStick is one of the top alternatives to ServerPilot and RunCloud with a super-fast control panel.

Let’s learn more about all the three cloud control panels to host your website and how they differ from each other in this exclusive review.
What is CloudStick?
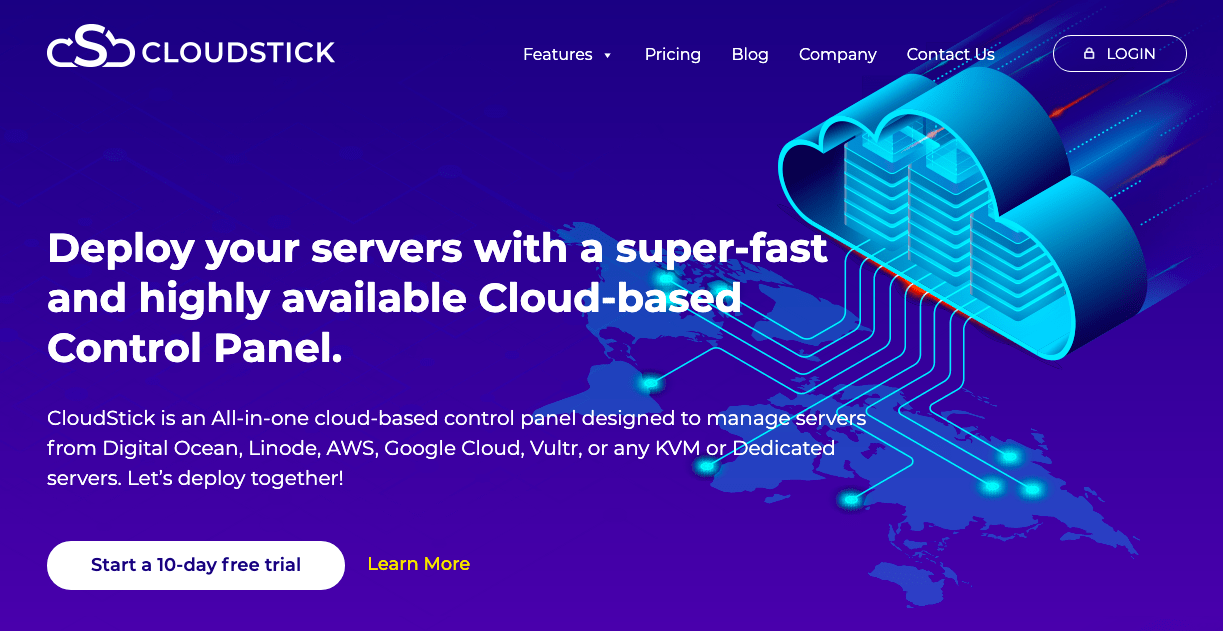
CloudStick is an ultra-impact cloud-based control panel allowing you to seamlessly manage your servers super-quick and easily. You can start a 10-day free trial at CloudStick and access innovative tools that empowers you to collaborate with your team and deploy servers quickly.
You no more have to worry about server maintenance, as the system does it for you saving tons of time.
CloudStick Features
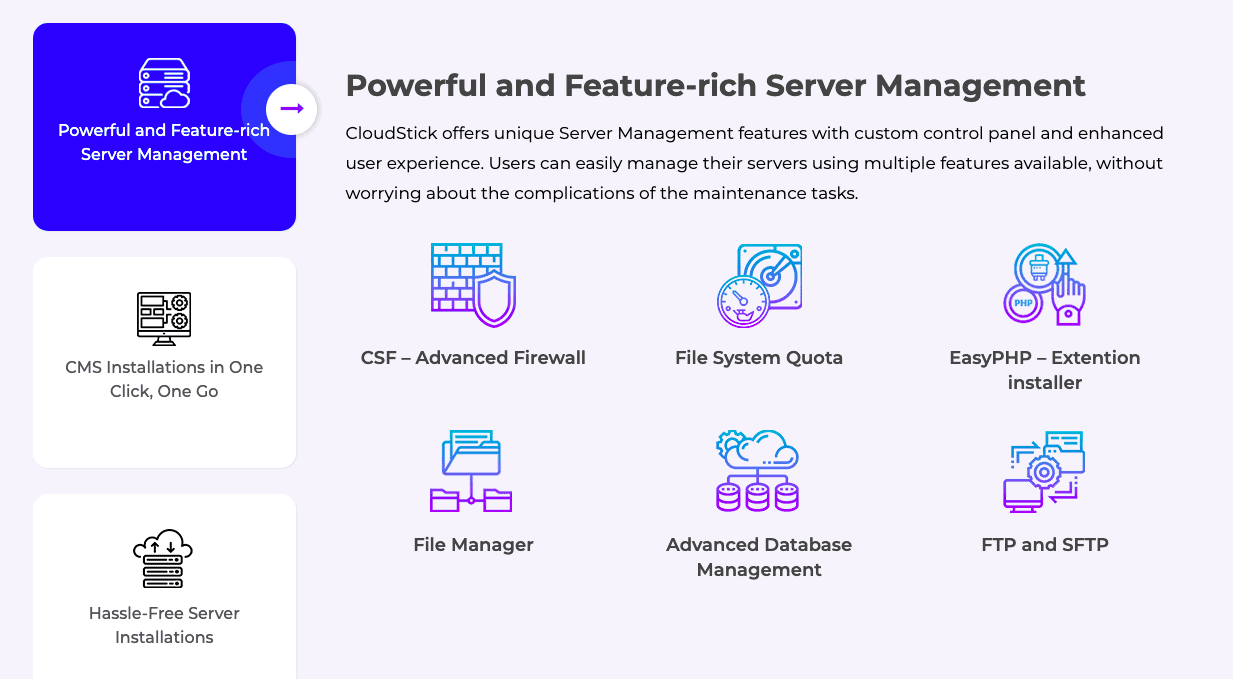
- One-click PHP extension installation without any complicated steps. You can install or uninstall with a single click is superb!
- Effectively and effortlessly manage the services on the servers. You can identify the resource consumption and start or stop the services at one-click.
- Real-time server monitoring allows you to collect server data and analyze the performance for the last 24 hours, 7 days, or 30 days.
- Pre-loaded multiple PHP versions to control PHP configuration for different PHP applications.
- One-click app installation like WordPress, Joomla, NextCloud, Nodejs and more.
- Manage hosting account and limit the resources for each user that helps you reselling hosting services.
- Compared to others, CloudStick provides advanced server firewalls like BruteForce protection, IP blocking, etc.
- Intuitive file manager to easily add, edit code, compress, uncompress instead of FTP/SFTP/SSH credentials.
- Automatic backups and restore with CloudStick Storage is a cost-effective solution to save your data.
CloudStick Pricing
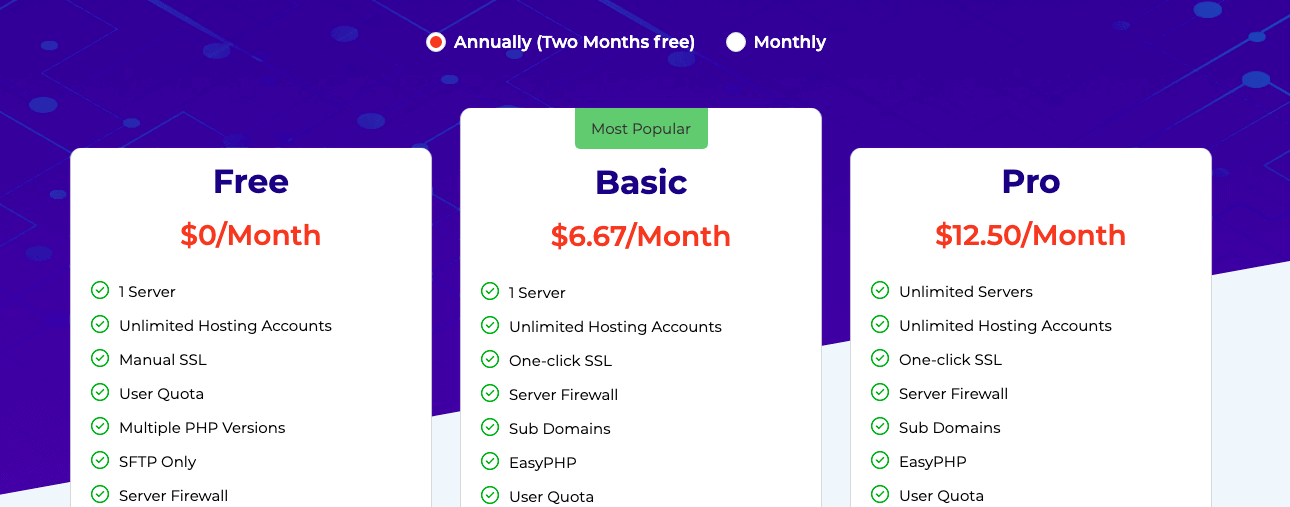
Get the most affordable plans in the industry and save more by choosing annual billing.
You can kick-start with the free plan to manage a single server and unlimited hosting accounts.
It is the most popular plan as it is cost-effective and good enough to manage one server and unlimited hosting accounts.
The Pro plan costs 150$/year and allows you to manage unlimited servers with more advanced features.
Now let me jump to the main section of CloudStick review, and explain to you how to create your first WordPress site.
CloudStick Tutorial: Steps to Create A WordPress Site
https://www.youtube.com/watch?v=M\_k\_hQsfbz0
In this exclusive tutorial, I will show you how to set up your server and a WordPress site with CloudStick cloud control panel. You can kick-start with the 10-days free-trial with no credit card information asked, so your money is safe and it's a risk-free investment.
There is a free plan that you can start with, but it has many limitations like no one-click free SSL, and no one-click installation of PHP extensions. But the free plan allows you to connect one server and host unlimited hosting accounts.
So let’s begin with the steps for creating your first WordPress site at CloudStick.
Use Coupon VKAPOOR to get 50% off on Annual Plan of CloudStick
Create an Account
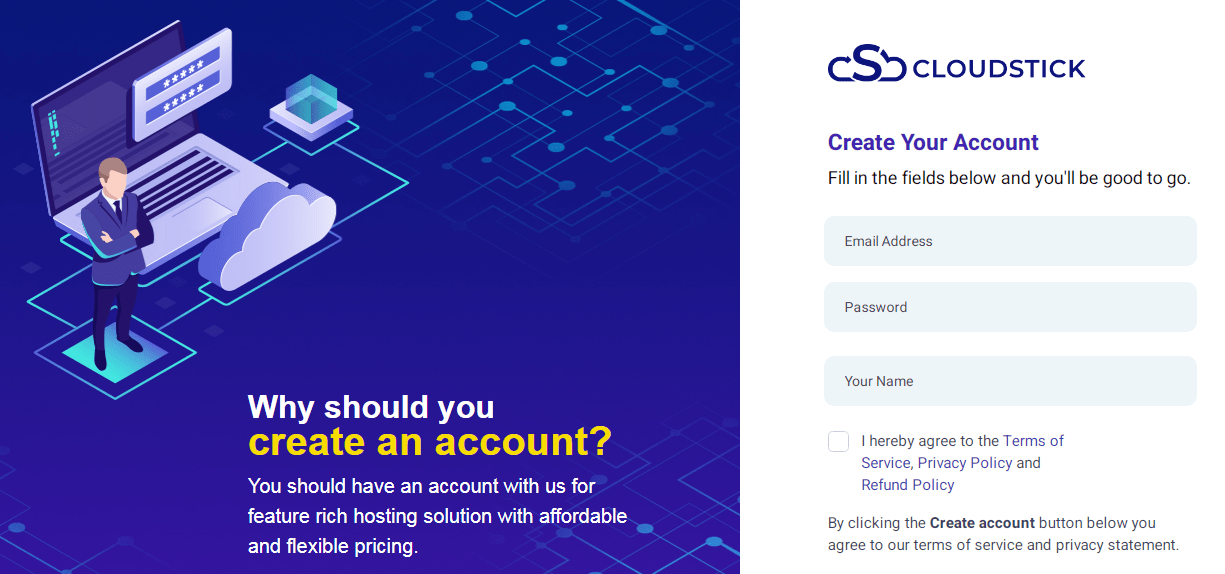
Creating an account at CloudStick is easy and free with minimal details like your email address, password and name. Then check the box of agreeing to the terms and conditions, and finally click on the Create Account button. Easy, isn’t it?
You may have to complete your email verification by clicking on the verification link received on your inbox. Once it is verified, you can access your CloudStick control panel with the email address and password that you had registered with.
Creating a Server on UpCloud
To host your website with CloudStick, you need a cloud server. I recommend UpCloud as the best cloud hosting provider. So, I will create a server in my UpCloud account.
Here’s how you can create a server
- Login to UpCloud
- Click on Deploy Server
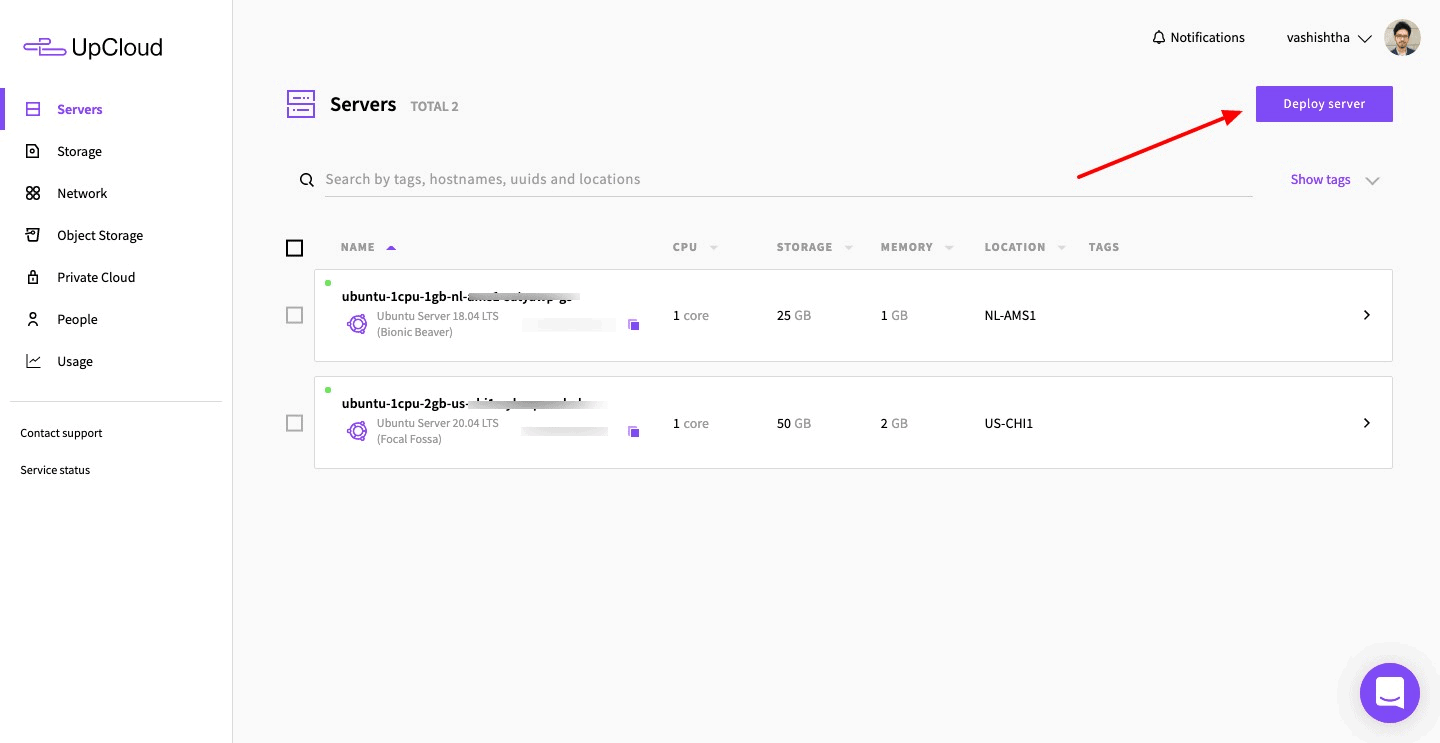
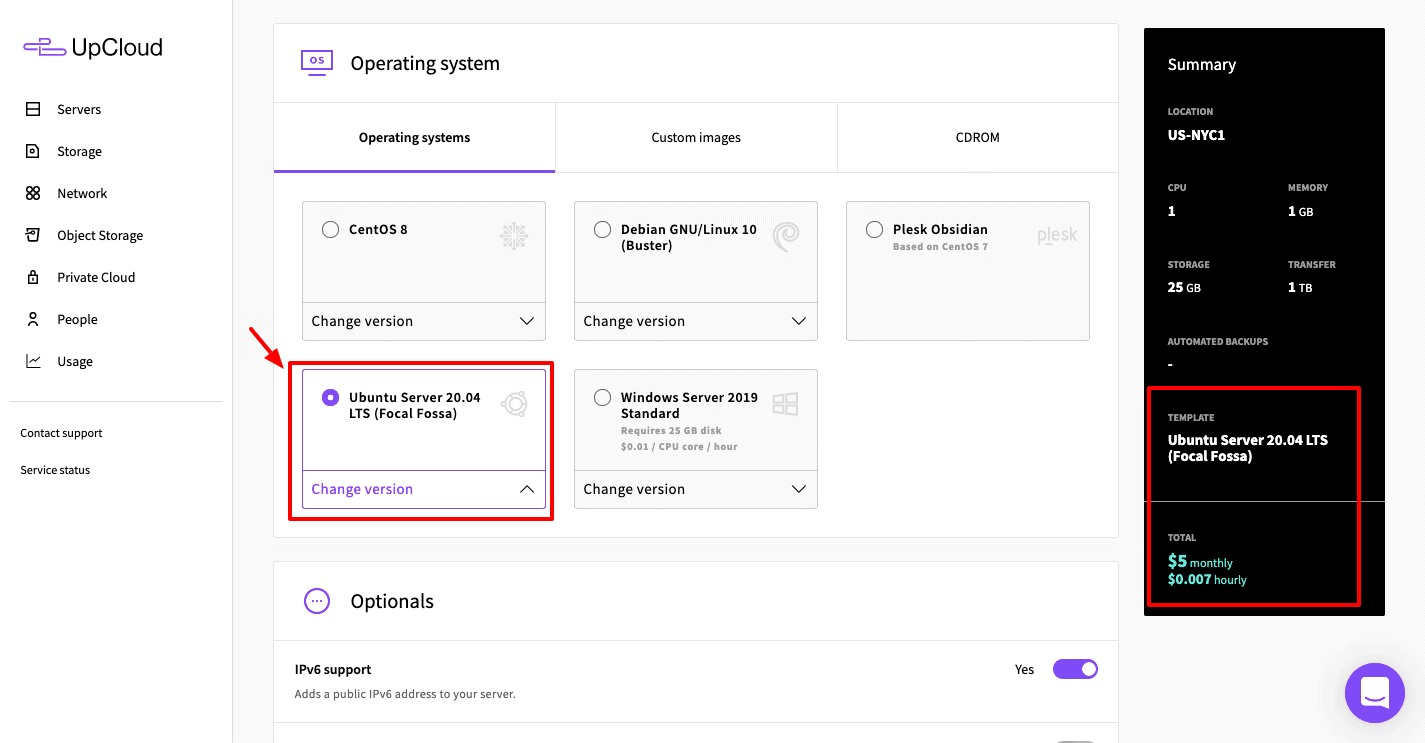
- Choose your preferred location, pricing plan, operating system (ubuntu only) and click on deploy.
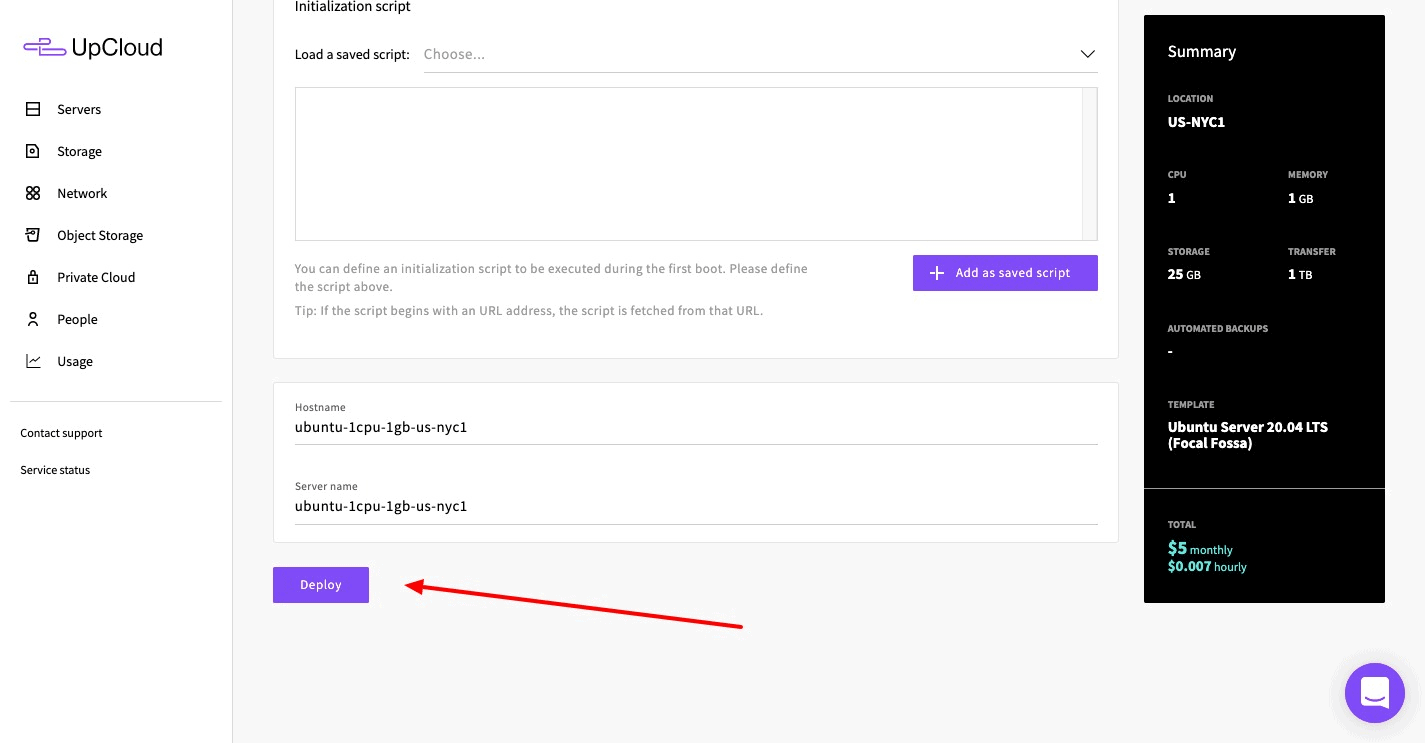
After the server is deployed, you will receive an email with the SSH root login credentials. Keep it safe.
Get $25 Free Credits in UpCloud and Deploy a Server Now
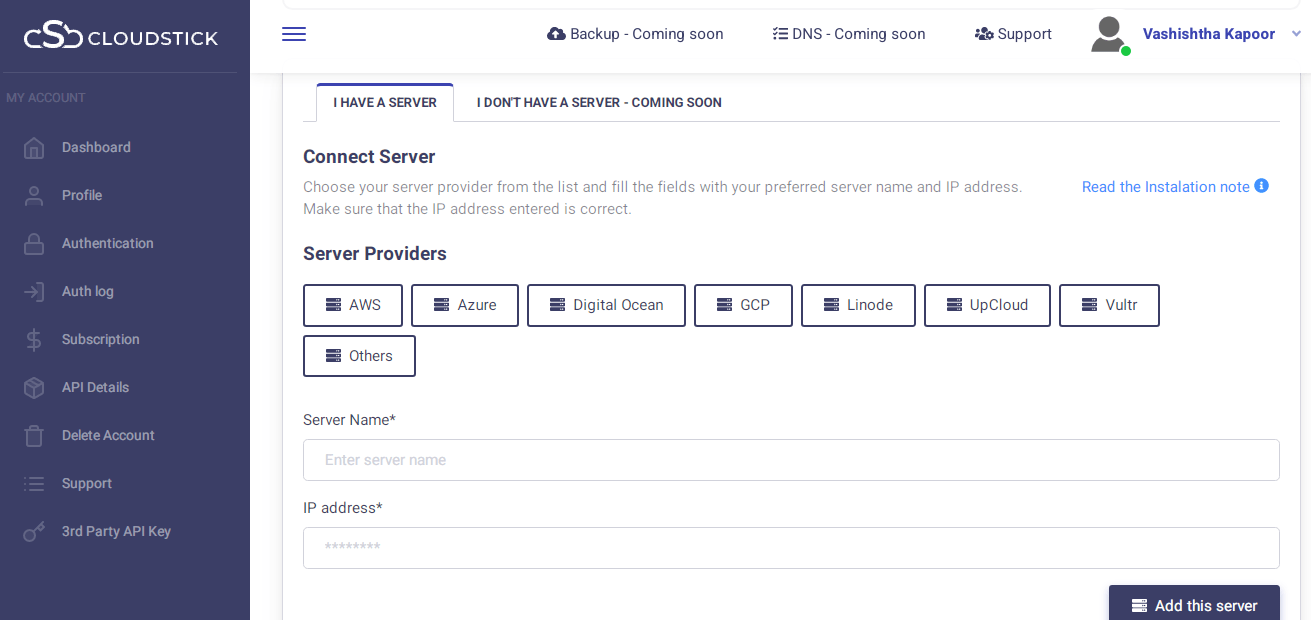
Adding Server in CloudStick
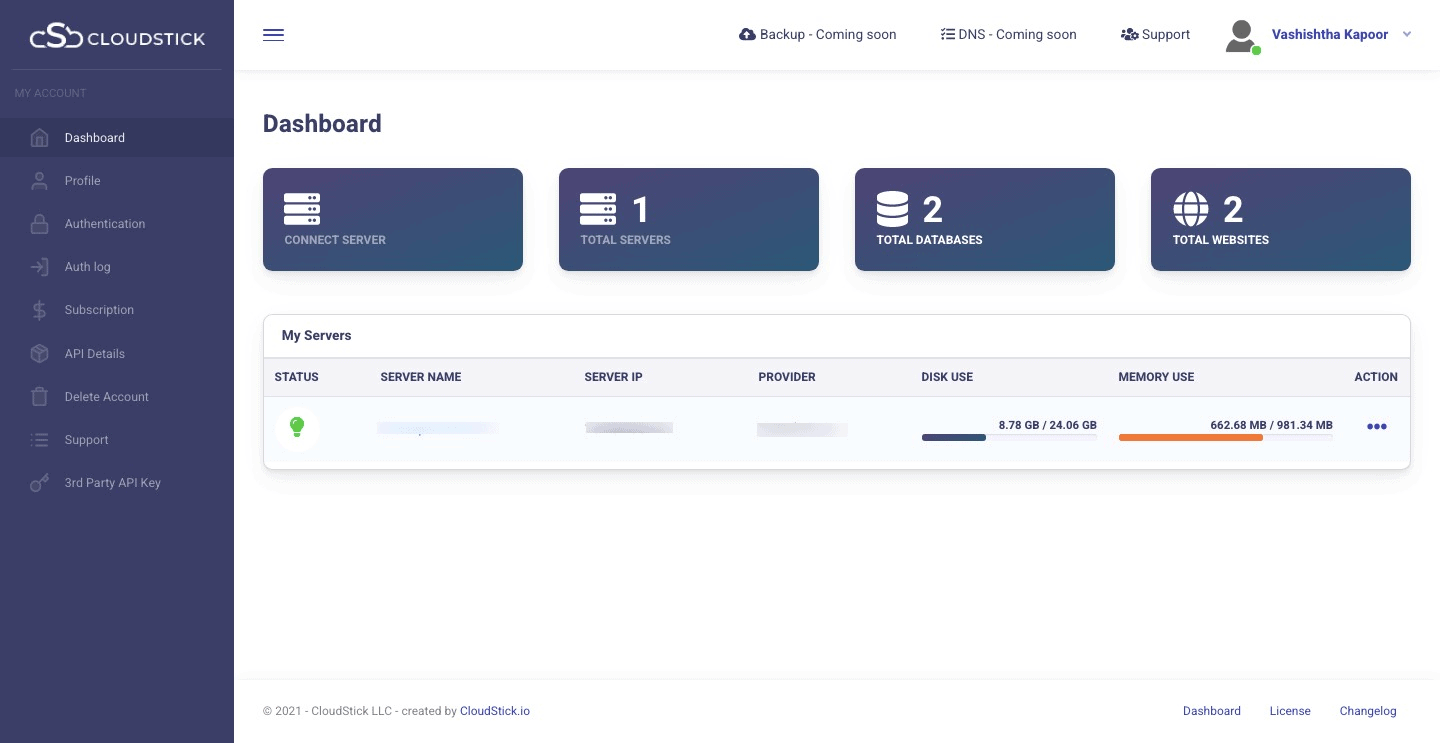
After logging into your CloudStick dashboard, you will find different tabs like Connect Server, Total Servers, Total Databases, and Total Websites.

To create a new server, click on Connect Server. Now before you proceed for choosing a server, you should remember some important points.
CloudStick can work on a VPS or a Dedicated Server with Ubuntu operating system, (supported Ubuntu releases are 16.04/18.04/20.04 LTS.)
A fresh Ubuntu installation is required as CloudStick doesn’t work with existing ServerPilot or RunCloud that would bring the system down.
Ensure to enable the inbound traffic for ports 22/tcp, 80/tcp and 443/tcp as CloudStick doesn’t work with NAT, VPN, OpenVZ. Also make sure that the ICMP-IPV4 are open.
Now, you can choose your server provider from the list of providers like AWS, Azure, DigitalOcean, UpCloud, Linode, Vultr, and more. Obviously, here I choose Upcloud as my provider.
Fill up the server name and IP address of the server and click on Add this Server.
Now that you have added your preferred server, you need to connect CloudStick with your server.
You can do it with direct installation or manual installation.
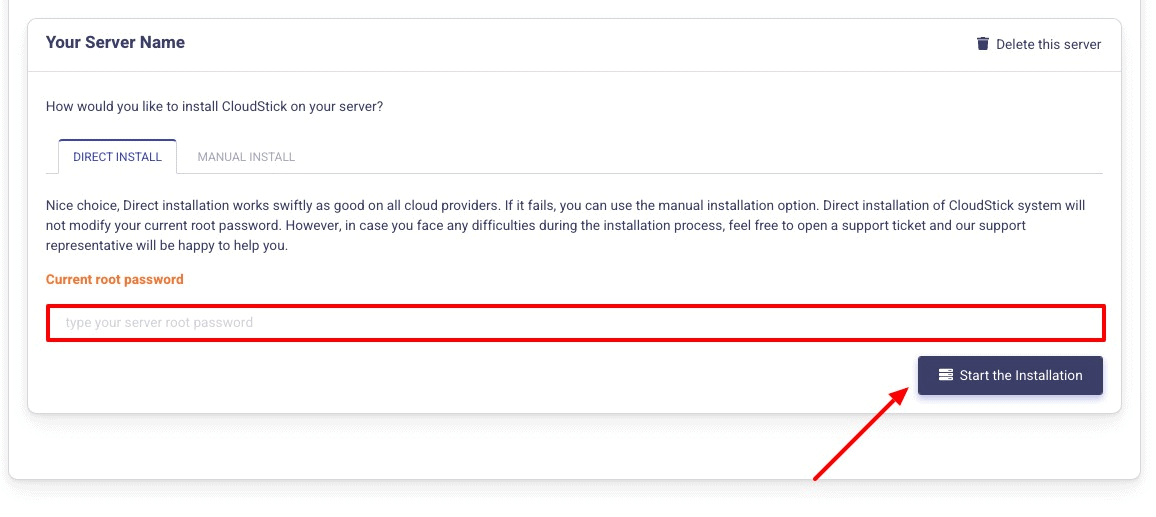
Direct installation is hassle-free and if it fails, you can choose the Manual installation option.
Provide your current root password which won’t be changed if you choose the Direct install method. Click on Start the Installation button and CloudStick will do the rest for you.
Use Coupon VKAPOOR to get 50% off on Annual Plan of CloudStick
Installing WordPress On Your Server
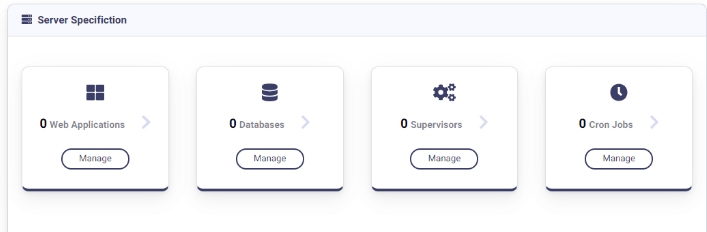
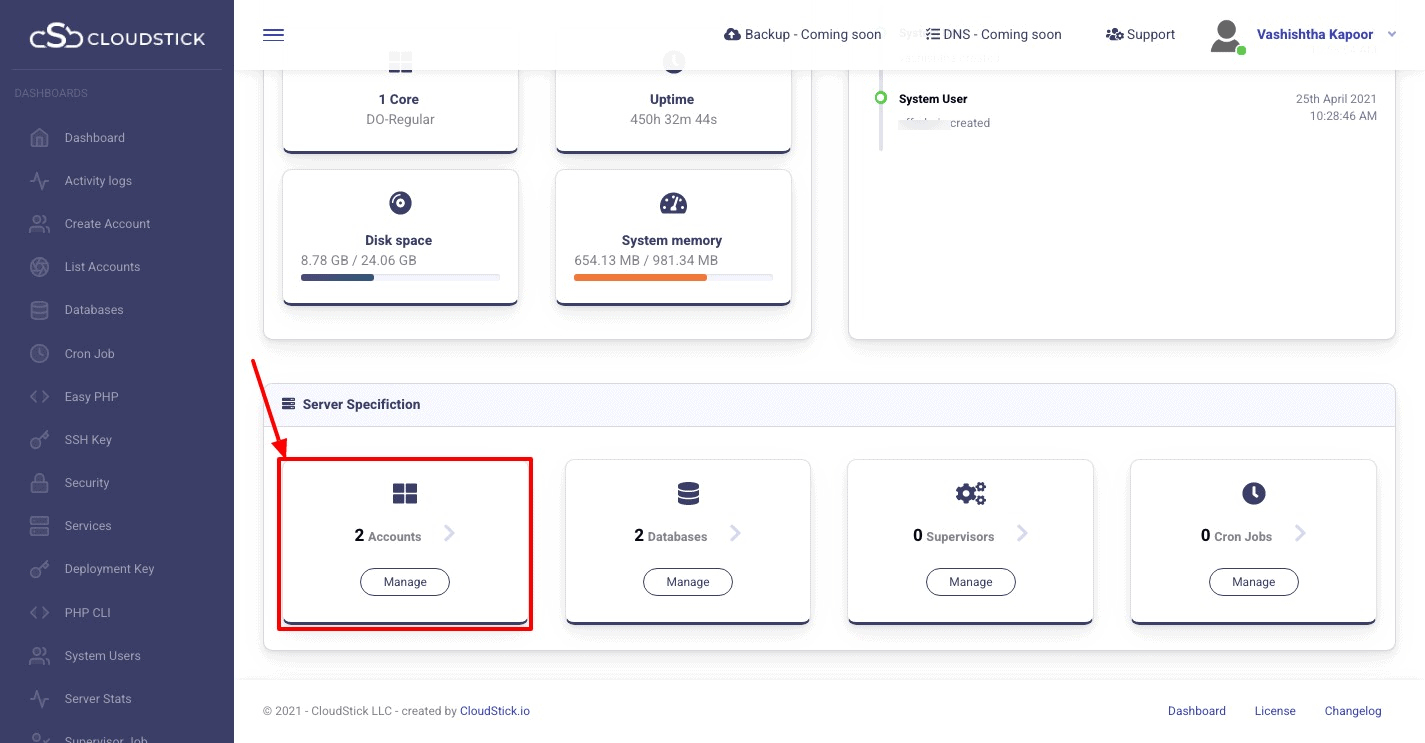
Choose the server, and click on Manage. Scroll down to the server specification, and click on Web Applications.
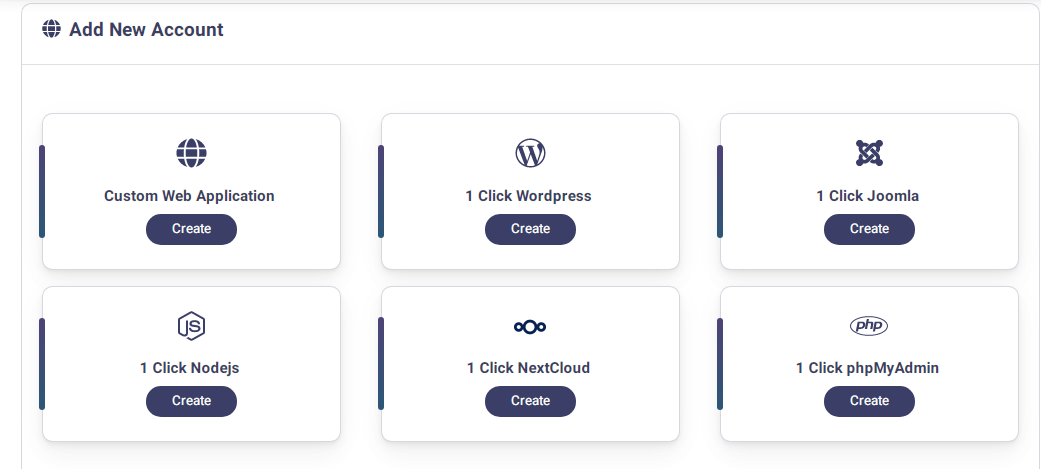
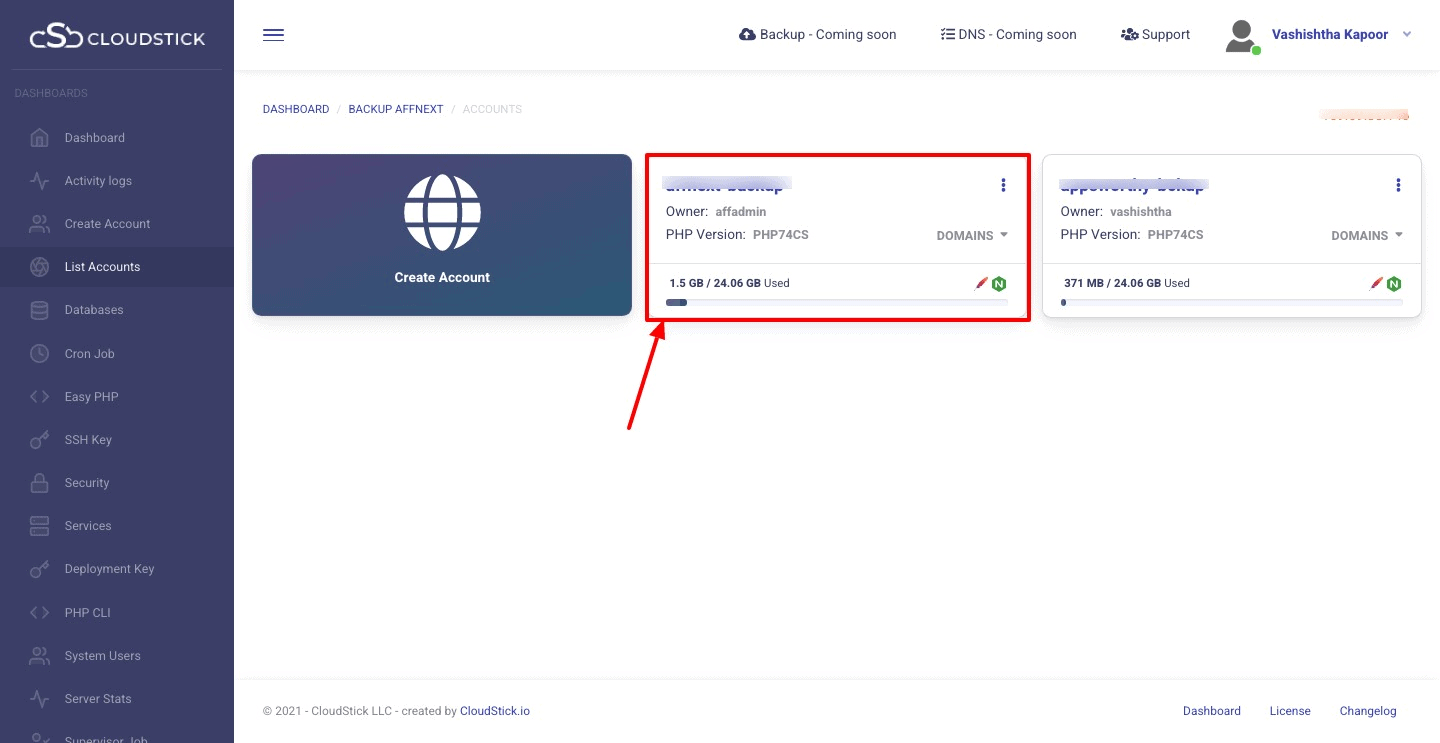
Click on Create Account and you will find 1-click web applications like WordPress, Joomla, Nodejs, NextCloud, phpMyAdmin, or custom web application.
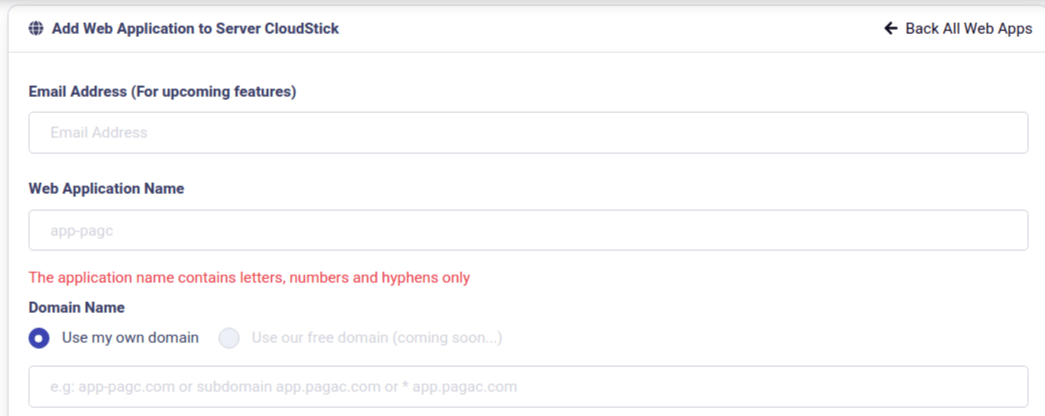
Installing WordPress applications on your server is quick and easy with one-click. In your dashboard, click on 1-click WordPress installer.
Provide the necessary information like email address, web application name, and either choose your domain name or choose a free domain.
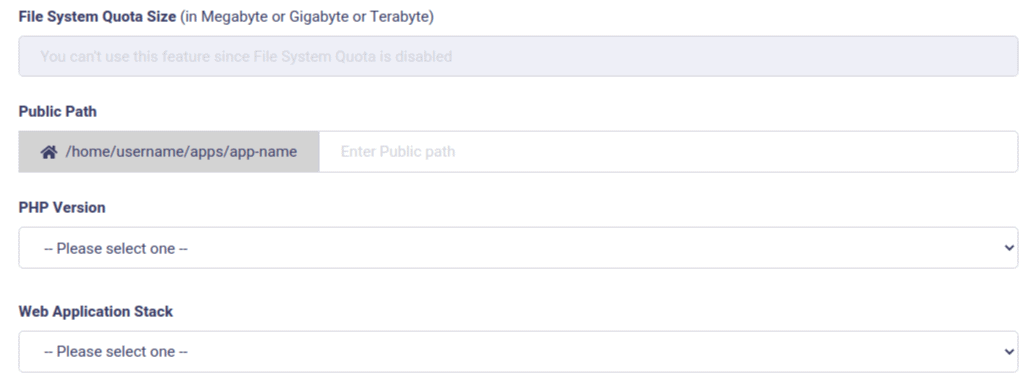
Then, select the PHP version, web application stack (Native Nginx or Nginx + Apache) , and enter a username and password for WordPress dashboard.

Finally click on Add Web Application and your WordPress site is ready. Now you can customize it by installing WordPress themes and plugins as you want.
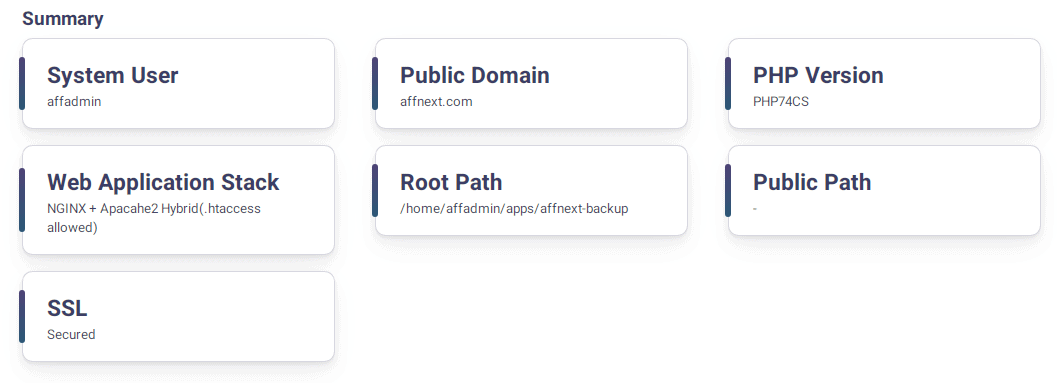
You can choose the domain, check the configuration, and install a free SSL certificate at one-click.
Manage Server & Applications
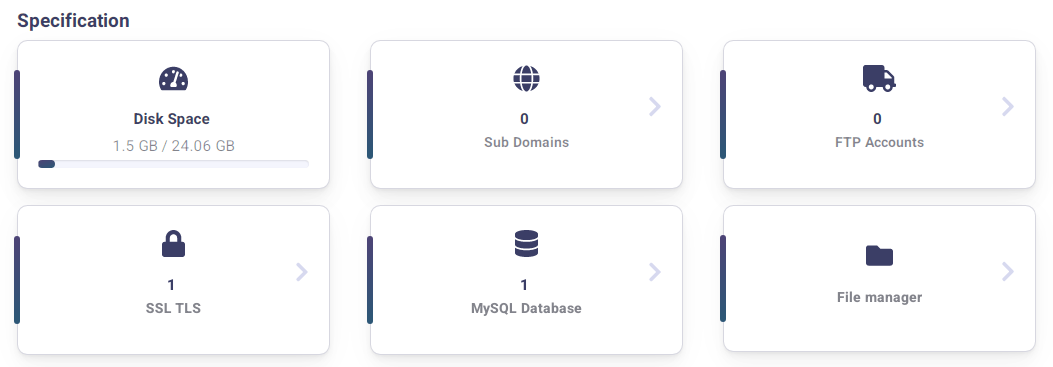
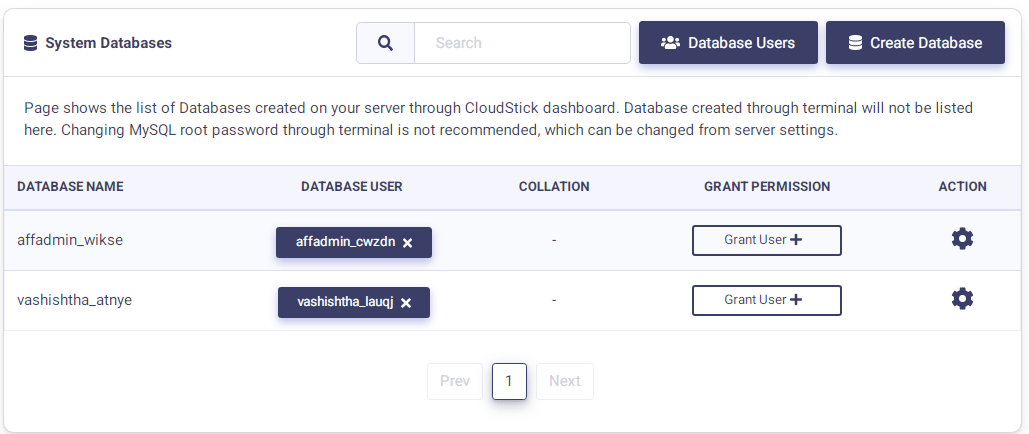
By clicking on databases, you can see the list of databases created. You can also create a new database by clicking Create Database.
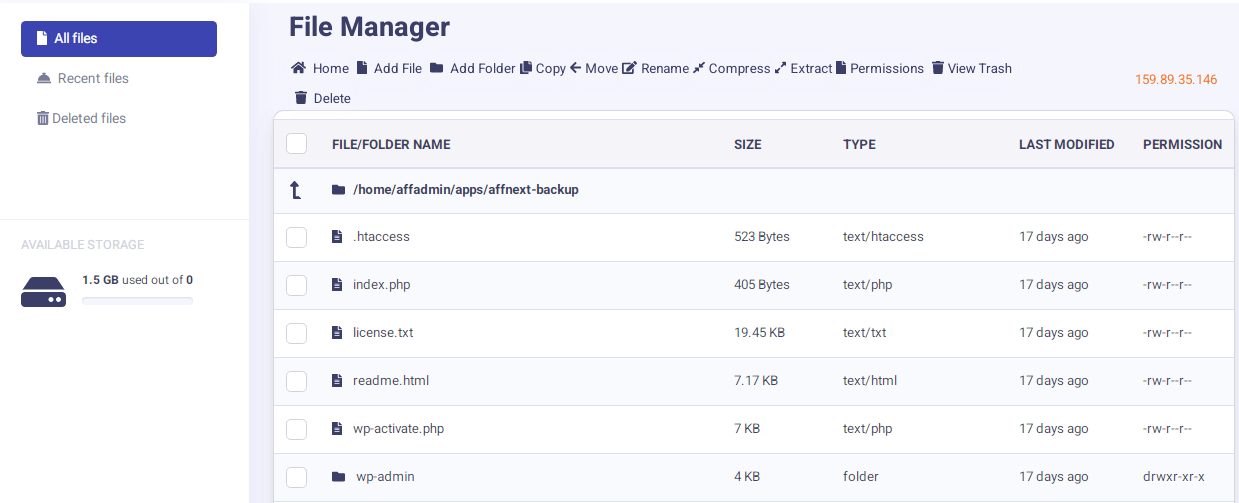
You can go to the file manager to add, edit or delete any files.
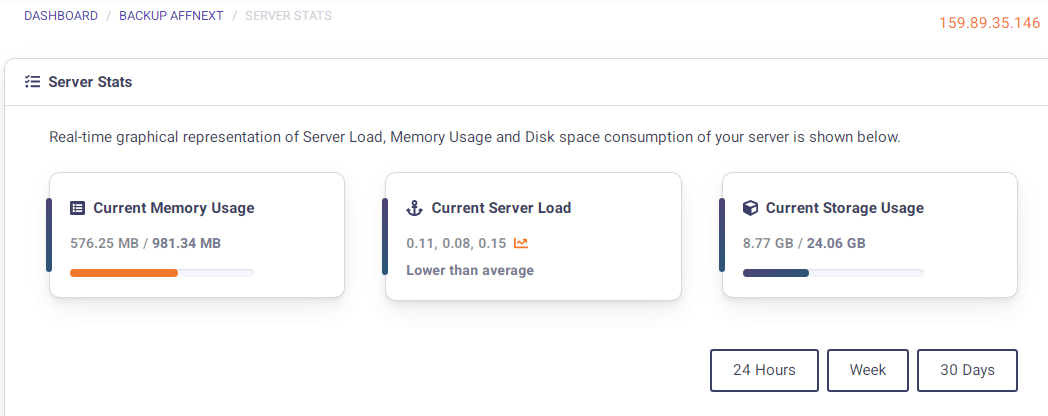
If you want to check how the server is performing, you can check that too by clicking on Server Stats. It shows you memory usage, server load, and storage occupied by your website.
Managing Backups
With one-click backup, you can save the entire website content and restore it whenever you like to.
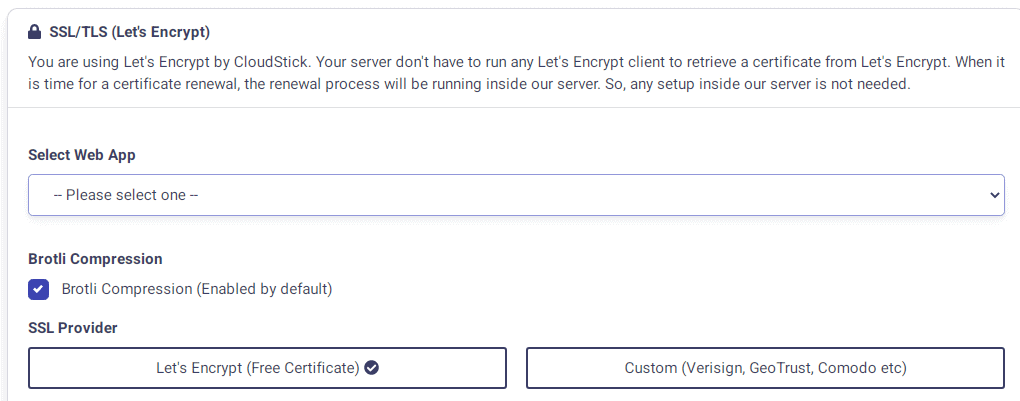
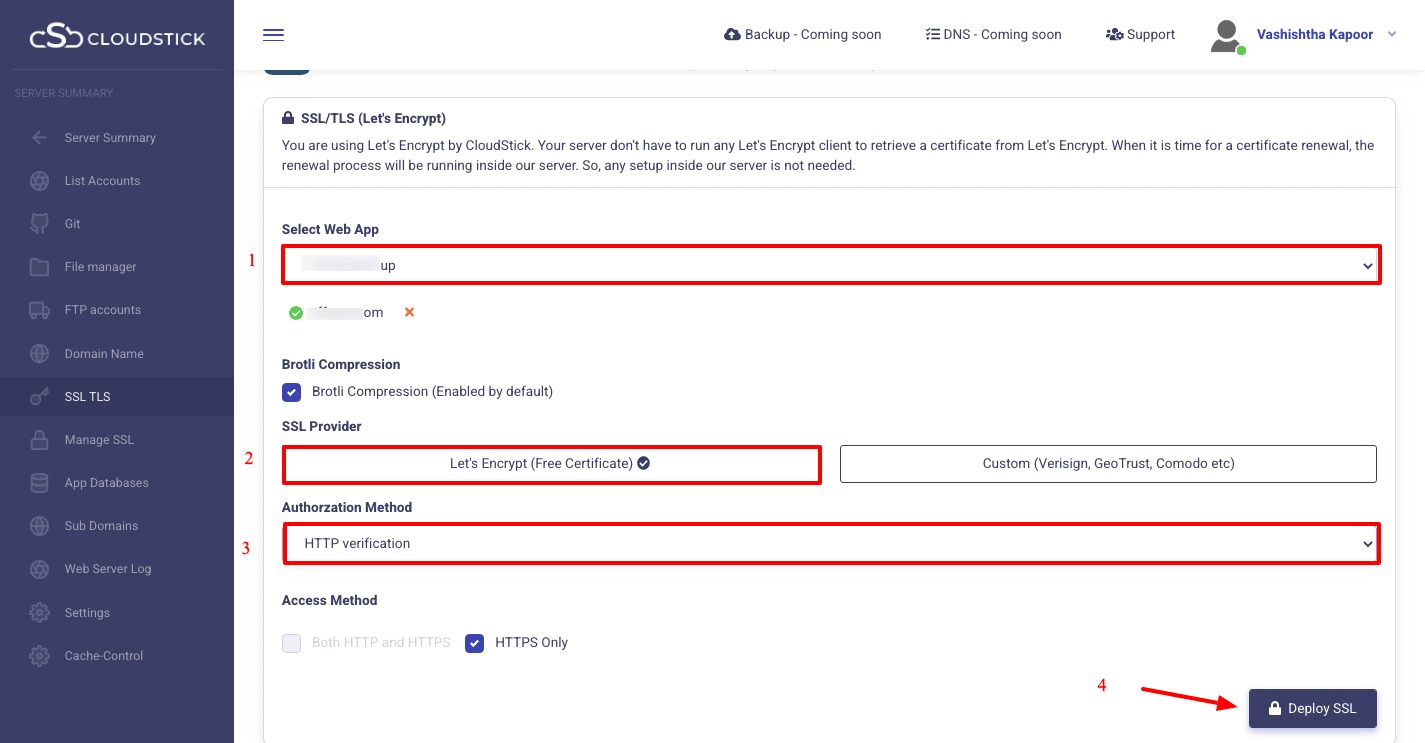
How to Install SSL Certificate
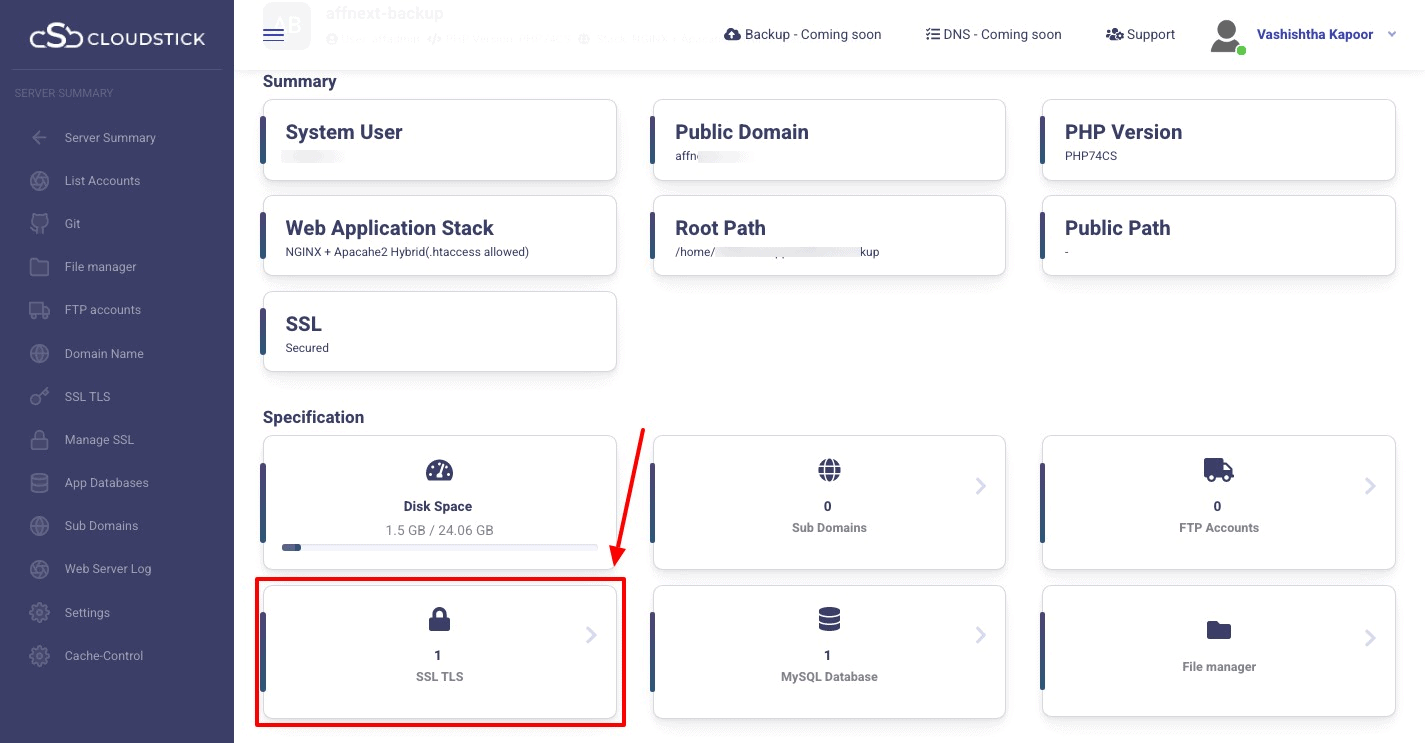
To install the FREE automatic SSL certificate, simply click your server name in the CloudStick dashboard and choose the account.
Choose the account (website) in which you want to install the SSL.
Click on SSL/TLS
Before doing this, make sure you have pointed your domain to your server’s IP address. To do this, you need to change your A record in the DNS settings of CloudFlare.
Now, Choose the web app, SSL provider and the authentication method. If you already have a paid SSL certification, click on the “Custom” option instead.
Once ready, click on Deploy SSL and it will be ready in a moment.
Improve Performance with Server-Level Caching
For enhanced performance for your web application (WordPress site), you can enable the caching module to make your website faster.
Here’s how you do it.
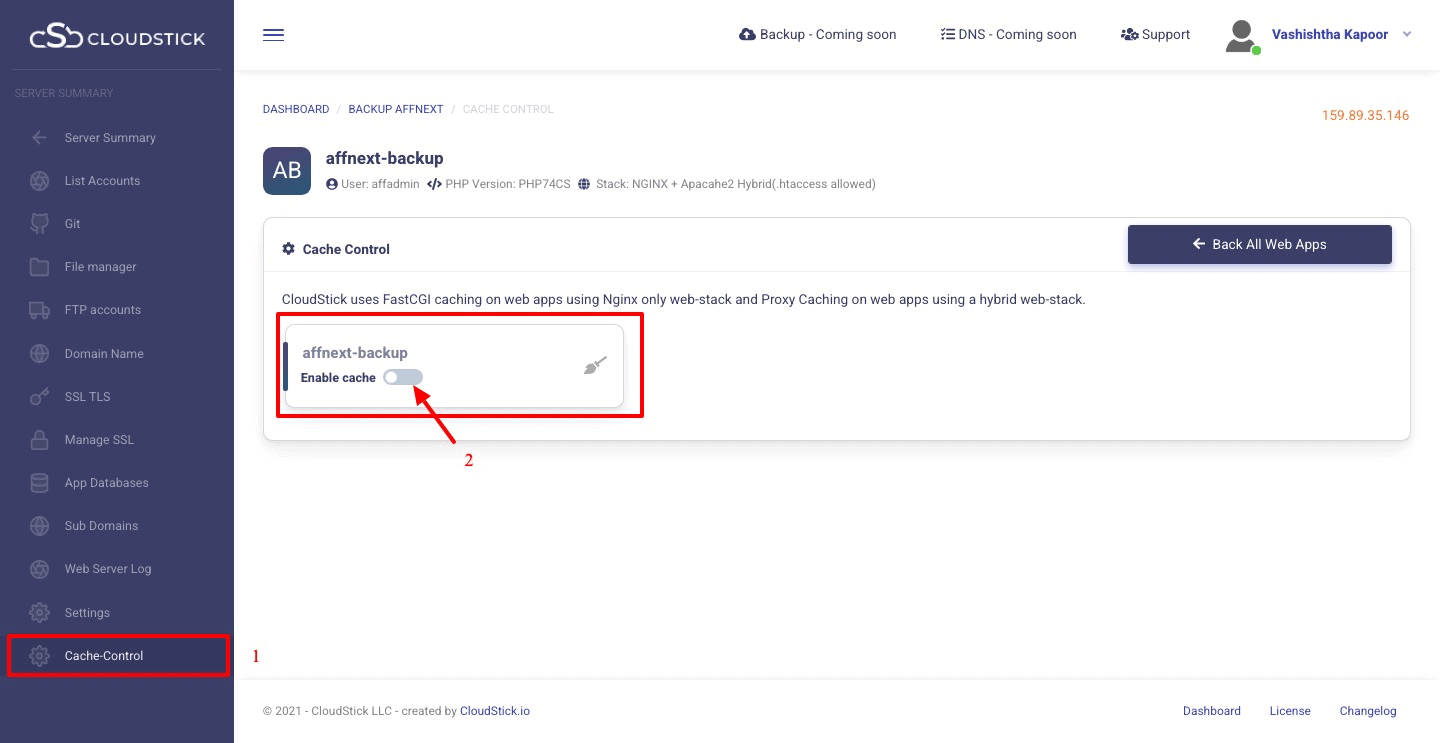
It automatically enables Fast CGI caching for accounts that are configured with Nginx only stack. For the Apache + Nginx (hybrid) stack, the CloudStick panel will enable proxy caching.
Conclusion
Hosting WordPress with CloudStick takes a few clicks and is free of cost. You can always upgrade your plan to access all the features.
I hope the CloudStick review was helpful to explain to you how to manage your server with a cloud control panel effortlessly. At one-click, you can install WordPress and start your blog or site in any niche.
If you find this CloudStick tutorial on setting up a WordPress site as useful, then please share it with others and share your thoughts in the comment section.
Comparison of ServerPilot vs RunCloud vs CloudStick
| Features | CloudStick | RunCloud | ServerPilot |
| Fast Installation | YES | NO | YES |
| Free Team Management | YES | NO | NO |
| Advanced Database Management | YES | NO | NO |
| One Click Free SSL | YES | YES | YES |
| One Click WordPress | YES | YES | YES |
| Manual SSL | YES | YES | YES |
| User/Web Hosting Account Quota | YES | NO | NO |
| Multiple PHP Versions | YES | YES | YES |
| File Manager | YES | YES | NO |
| Fix file and folder ownership | YES | YES | NO |
| Modify Nginx and PHP Settings | YES | YES | NO |
| SFTP and FTP Accounts | YES | NO | NO |
| Sub Domains | YES | NO | NO |
| Cache-Control | YES | NO | NO |
| Easy PHP – Install PHP extensions | YES | NO | NO |
| Git Deployment | YES | YES | NO |
| PHP CLI – Allow to change command line PHP version | YES | YES | NO |
| Server Firewall | YES | YES | YES |
| Activity Log | YES | YES | NO |
| Web Server Log | YES | YES | YES |
| Cron Job Management | YES | YES | |
| Supervisord Management | YES | YES | NO |
| Time Zone Management | YES | YES | NO |
| Manage service | YES | YES | NO |
| Server Transfer | YES | YES | YES |
| Change root user password | YES | NO | NO |
| Change Server IP Address | YES | YES | NO |
| Reset Mysql root password | YES | NO | NO |
| SSH Key Management | YES | YES | YES |
| Tweak SSH Settings | YES | YES | NO |
| Deployment Keys | YES | YES | NO |
| One click Open Source project installations | YES | NO | NO |
| Server Health Status | YES | YES | YES |
| Atomic Git Deployment | NO | YES | YES |
| Change auto-update settings | YES | YES | YES |
| Clone web application | NO | YES | NO |
| Graph of data transferred out per web application | NO | YES | NO |
What is ServerPilot?
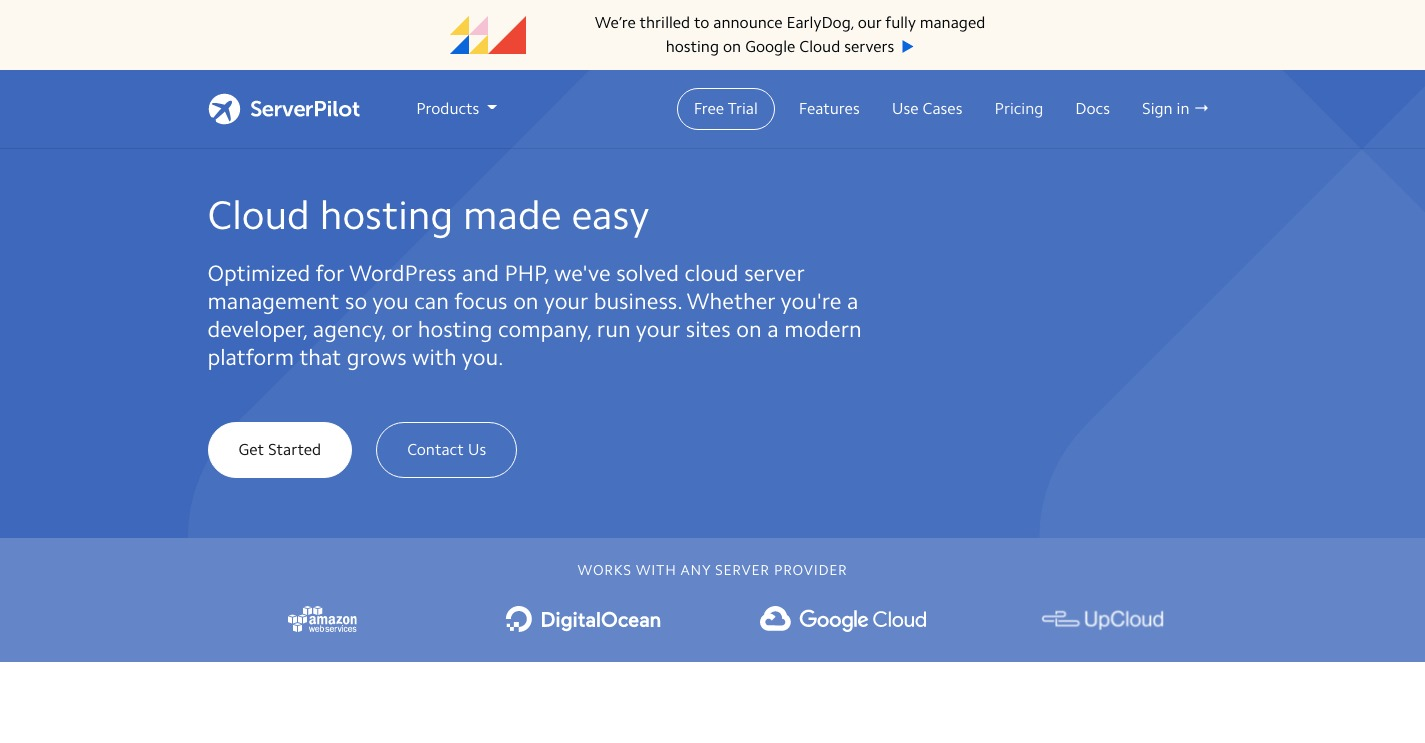
ServerPilot offers WordPress and PHP optimized cloud hosting and cloud server management systems. It uses the advanced technologies to provide speed, security, and support. You can host PHP or WordPress sites on any cloud servers including DO, Google, and Amazon.
ServerPilot Features
- A modern control panel with pre-installed software like PHP, MySQL, Nginx, and Apache. You no longer have to administer your servers as ServerPilot centralized hosting control panel does it for you.
- High security with iptables firewalls to secure your server and give you peace of mind.
- Your servers are updated timely and on a regular basis. With automatic updates, you won’t miss out on any functionality and your site will be up and running.
- Free Let’s Encrypt SSL certificate.
- Monitor and analyze your servers with resource utilization statistics and performance metrics.
ServerPilot Pricing
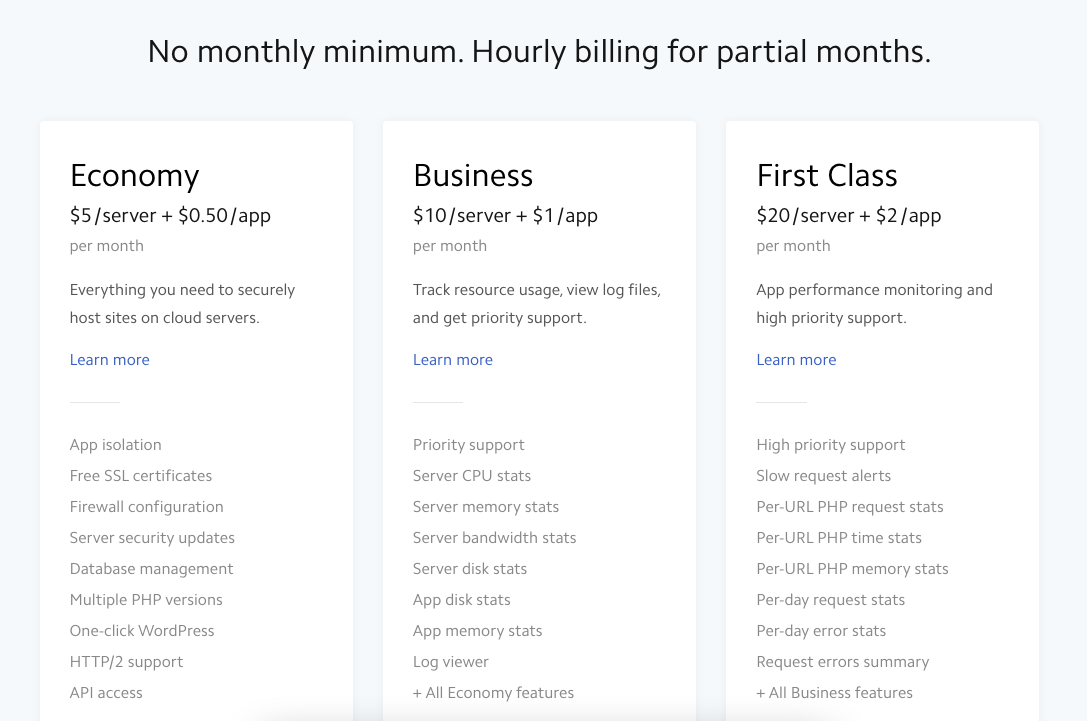
The pricing plans are different from RunCloud and CloudStick. Here, you have to pay only for the resources you use.
- Economy: $5/server + $0.50/app per month
- Business: $10/server + $1/app per month
- First Class: $20/server + $2/app per month
Why Choose CloudStick as a ServerPilot Alternative?
- ServerPilot does not offer free team management and an advanced database management system.
- Can’t easily install PHP extensions.
- File manager to add or edit the coding is not available.
- You can’t modify Nginx and PHP Settings.
- You cannot reset MySQL root password and customize mysql settings in ServerPilot.
- No Git deployment in ServerPilot.
- User quota is not available in ServerPilot.
What is RunCloud?
RunCloud offers a 5-day free trial to try out its powerful cloud server management control panel. With RunCloud’s simple and intuitive cloud control panel, you no longer require Linux expertise and can easily build a website on the top cloud hosting solutions. Whether you are a blogger, startup, or an enterprise, you have got the tools to run a cloud hosting effortlessly at one-click.
RunCloud Features
- Deploy servers instantly in one-click with complete control under your hands.
- You just have to sit and watch, and RunCloud will set up the secure server for you in no time.
- Virtual PHP machines allow you to run any PHP version anytime you want.
- You can monitor your server performance from anywhere, anytime.
- Build webapps efficiently with enhanced UI/UX.
- Git deployment ensures zero downtime.
- Store your data securely with backup every 30 minutes. You can delete or retain backup for up to one month and restore it to any server.
- The management panel is secured and offers a single interface for best user experience.
RunCloud Pricing
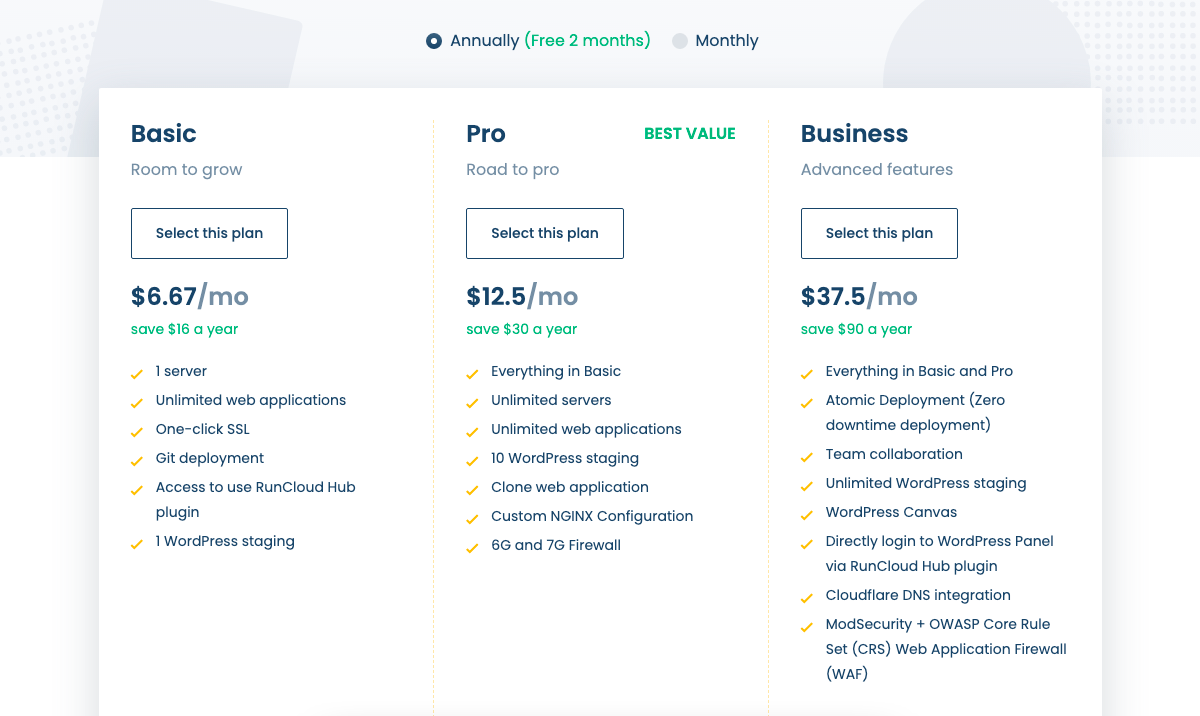
- Basic: $6.67/mo ( save $16 a year on annual billing)
- Pro: $12.5/mo ( save $30 a year on annual billing)
- Business: $37.5/mo ( save $90 a year on annual billing)
Why Choose CloudStick as a RunCloud Alternative?
- Installation is not as fast as CloudStick and keeps you waiting.
- Can’t easily install PHP extensions.
- You cannot reset MySQL root password and customize mysql settings in RunCloud.
- One-click open source project installation is unavailable.
- User quota is not available in RunCloud.
Use Coupon VKAPOOR to get 50% off on Annual Plan of CloudStick